TestPatterns for MediaPortal 1.11 (1 Viewer)

Marcus Venturi

MP Donator
  • Premium Supporter
  • March 23, 2012
    614
    745
    56
    Home Country
    Germany Germany
    MediaPortalBannerWide.png


    While developing a new feature for my Auto3D plugin, I often had the problem, that the image on the screen was somehow distorted. This got even worse, when using ViewModeSwitcher with 3D formats, because ViewModeSwitcher didn't know nothing about 3D.

    To be able to debug that problems I wrote a small utility that displayed a simple raster on the screen. I could also use many of the various test pattern movies offered via YouTube, but I wanted a possibility to switch between a specific movie and the test pattern on the fly to check if the geometry is correct.

    Switch between different patterns can be done faster than switching between test patterns in form of movies.

    And some time ago, I found an interesting post from @kiwijunglist about perfect playback and display calibration:

    https://forum.team-mediaportal.com/...back-display-calibration.119610/#post-1001745

    In this very informative post a small video was used to calibrate the black level of the display. The video was necessary, because the test consisted of 2 alternating images. Therefore I extended my utility to be able to alternate between 2 test patterns in a defined time. Now I was able to integrate black and white level tests.

    From that moment I always had my test patterns at hand, without having to search them anywhere on my disks.

    As I thought that such a tool could also be helpful to others, I created a full MediaPortal plugin out of it.

    Main window
    upload_2015-4-1_21-1-30.png


    It is possible to add new, delete or modify existing test patterns.

    Add/modify test pattern
    upload_2015-4-1_21-5-7.png


    Common Information

    Every test pattern has a name, a description and maybe a link to a short description how to use this pattern

    Images

    Then you can add 2 images for 16:9 and 21:9 aspect ratio. Every Image is copied into the plugin data directory which normally is in C:\ProgramData\Team MediaPortal\MediaPortal\TestPatterns.

    Alternate Images

    If you pattern needs an alternating image you can add those images here (like to above mention black/white level test).
    If you activate this feature you can add a time in seconds which is used for switching between the images.
    In most cases the default of 1 second should be enough.

    Hotkey for Selection Menu

    The hotkey for showing the list of the available patterns in MediaPortal can defined, the default is CTRL + T.

    If you now start MediaPortal and press CTRL + T the following list appears:

    TestPatternsMenu.png


    Now if you select a pattern, you will see it on the screen:
    TestPattern1.png


    This also works in 3D Mode:

    TestPattern2.png


    You can turn the test pattern off by pressing CTRL + T again and selecting the last item "Off" from the list.

    TestPattern3.png


    Here another example for a test pattern included.

    TestPattern4.png


    I'm currently developing a funny new feature for Auto3D were this plugin helps me a lot...

    Hints for Installation

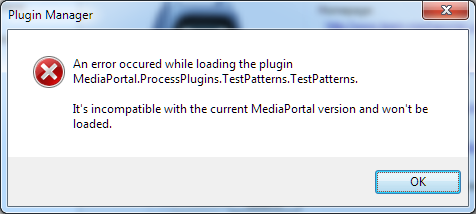
    This first version needs some changes in the MediaPortal Core.dll, therefore before installing the plugin you have to replace the existing Core.dll with the one from the plugin. This Core has all features contained in MediaPortal 1.11 plus my changes for TestPatterns plugin. Please backup your original Core.dll, to be able to restore it in case of problems.

    Do not install this on any MediaPortal Version earlier than 1.11, it won't work!

    OK that's all for today...
     

    Attachments

    • TestPatterns_1.11.zip
      2.1 MB
    • TestPatterns_1.11-2.zip
      2.2 MB
    Last edited:

    kiwijunglist

    Super Moderator
  • Team MediaPortal
  • June 10, 2008
    6,746
    1,751
    New Zealand
    Home Country
    New Zealand New Zealand
    I think its important that for black calibration you use a video and use the same codec as you would use to watch a movie, because the video codec can treat the black levels differently to displaying a picture.
     

    Marcus Venturi

    MP Donator
  • Premium Supporter
  • March 23, 2012
    614
    745
    56
    Home Country
    Germany Germany
    I have various films that use different codecs. If I calibrate the TV to one specific codec, it might look bad with all other codecs. So the best way would be to turn off any color corrections in all codecs.

    Only then you have a chance to calibrate the TV to have a good display, independent of the selected codec.
     

    SpudR

    Retired Team Member
  • Premium Supporter
  • July 27, 2007
    2,657
    718
    Yorkshire, UK
    Home Country
    England England
    Once properly tested this needs adding to the MPEI - Very useful!!
    I get a version incompatible error (MP 1.11) and MP wont load it.
     

    Attachments

    • oops.png
      oops.png
      31.8 KB

    Marcus Venturi

    MP Donator
  • Premium Supporter
  • March 23, 2012
    614
    745
    56
    Home Country
    Germany Germany
    @SpudR: Have you replaced the Core.dll - as described in Hints for Installation above - with the one contained in my ZIP file?
     

    kiwijunglist

    Super Moderator
  • Team MediaPortal
  • June 10, 2008
    6,746
    1,751
    New Zealand
    Home Country
    New Zealand New Zealand
    You might want to include this test pattern.

    In my samsung tv I can set to blue only mode, then I calibrate the colour so the blue bar matches the blue square in the middle.

    Step 6: Setting Color and Tint
    The color (or saturation) control is an adjustment that increases or decreases simultaneously, the saturation of the red, green and blue color components. If saturation were completely removed, the image would be gray; if the saturation were maximized, then red would be too red, green would be too green and blue would be too blue.

    The tint (or hue) control is an adjustment that essentially shifts the colors towards each other. For example, the control can simultaneously make red more blue, green more red and blue more green or the opposite.

    Remember, the goal is to meet the Rec. 709 standard which precisely defines the characteristics of red, green and blue. The “Flashing Color Bars” pattern located in chapter 4 of the Basic Settings on the AVS HD 709 disc will allow a the color saturation and tint controls to be set as accurate as possible by eye.

    With the pattern playing, engage the display’s blue-only mode or view the display through a blue filter and adjust the color and tint controls such that the flashing boxes are neither too dark or too light. Ideally, the blue color inside and outside the flashing boxes will be exactly the same.

    color_tint.png
     

    kiwijunglist

    Super Moderator
  • Team MediaPortal
  • June 10, 2008
    6,746
    1,751
    New Zealand
    Home Country
    New Zealand New Zealand
    I think this would be nice to have integrated into mpcore settings screen calibration.
     

    Users who are viewing this thread

    Top Bottom