
 New Zealand
Introduction:
This guide should help a lot of people who get confused how to setup the music view properly.
The most important step is to tag ALL your music files properly.
I also explain how to use the keyboard/remote control to navigate the my music section.
Some people think the music section of mediaportal lets it down, but I think a lot of the users havn't set it up properly.
I don't want the guide to be too complicated so I havn't explained the now playing window/internet lookups for top album tracks. I havn't gone into great detail on how the audioscrobber plugin works. I've just covered how to use it to get artist thumbnails. Explaining the fanart plugin is also beyond the scope of this guide.
Tagging music files:
This guide assumes you have properly tagged music files.
To properly tag your music files I recommend you use mptagthat (free) or tag & rename (30 day trial).
All music files should have the following tags
Artist Name / Album Artist / Album Name / Track Title
Folder & Filename Structure:
This step is optional as the file/folder names don't have any influence on how the music looks inside mediaportal unless you are using the shares view.
For folder and filename structure you should use
\music\<Album Artist>\<Album Name>\<Disc#><Track#> <Artist> - <Title>.mp3
eg. \music\The Smashing Pumpkins\Siamese Dream\01 The Smashing Pumpkins - Cherub Rock.mp3
Remeber, if it is a 1 disc album then just leave the Disc# tag blank.
This folder structure is best, because you can use the exactly the same file/folder name structure for complete albums/incomplete albums/compilation albums/multidisc albums/single tracks.
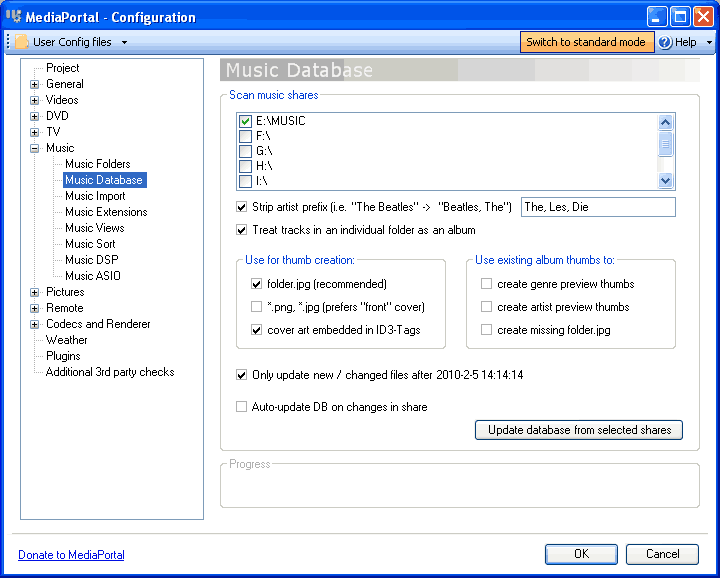
Mediaportal Configuration: My Music
Tick all the boxes in the screenshot below
Make sure create artist preview thumbs is unticked
Then click update database from selected shares, this will import all your music in the folders ticked above.
It will use the embedded art for the album covers.
Setup the following music views
Album artist
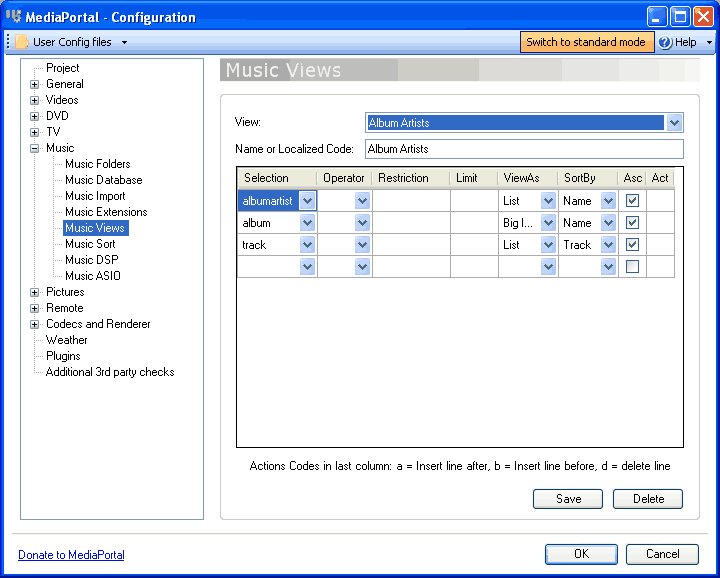
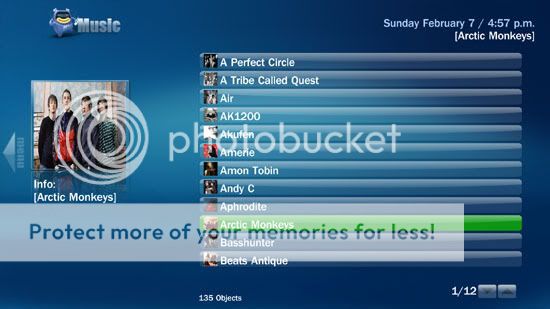
The above music view is album artist view. Each of the lines represents a step when you are browsing the music. So in this view, we will first see all the album artists arranged in a list ordered by name, when we click enter we will then see all the albums belonging to that album artist, with big icons, if we click enter again we will see the music tracks from that album presented as a list. Hopefully you understand what I mean and can make your own views, if not just copy the screenshot exactly =)
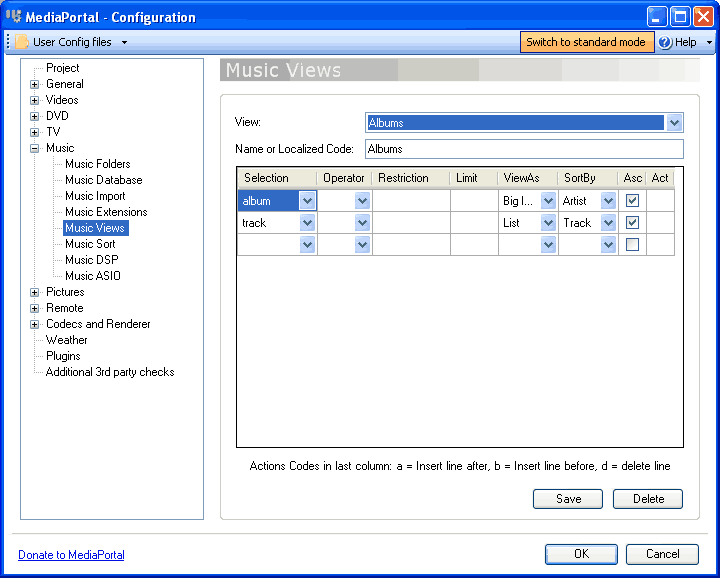
Albums
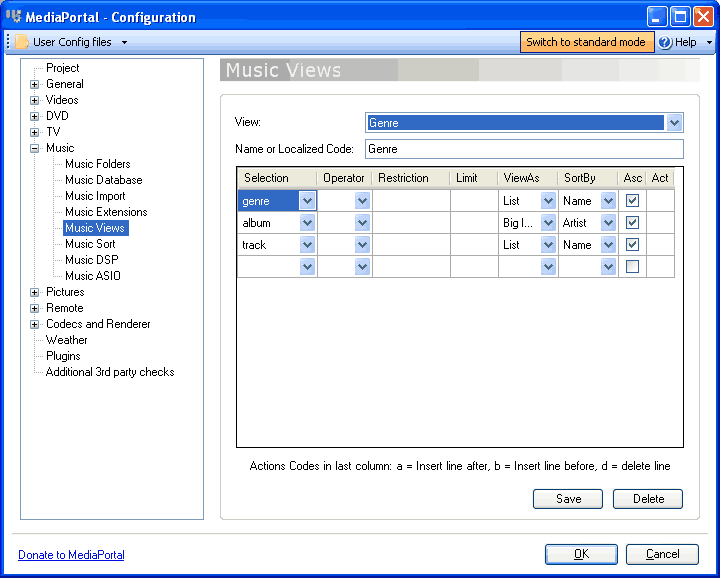
Genres
Aritst tracks
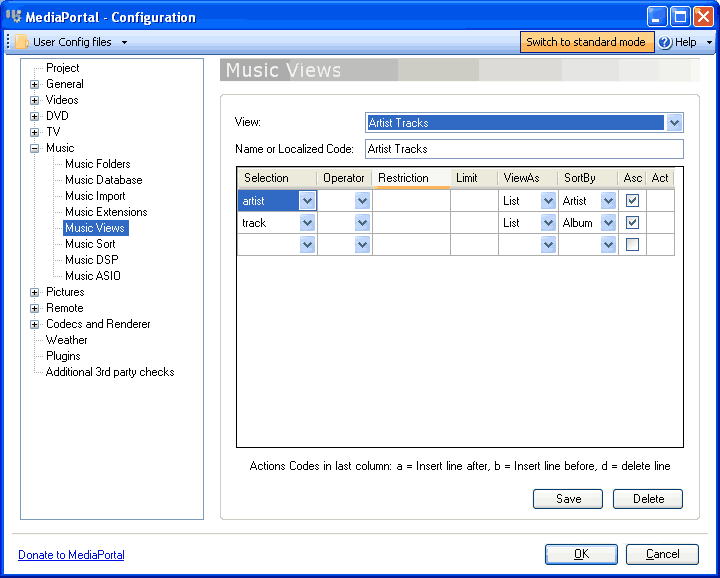
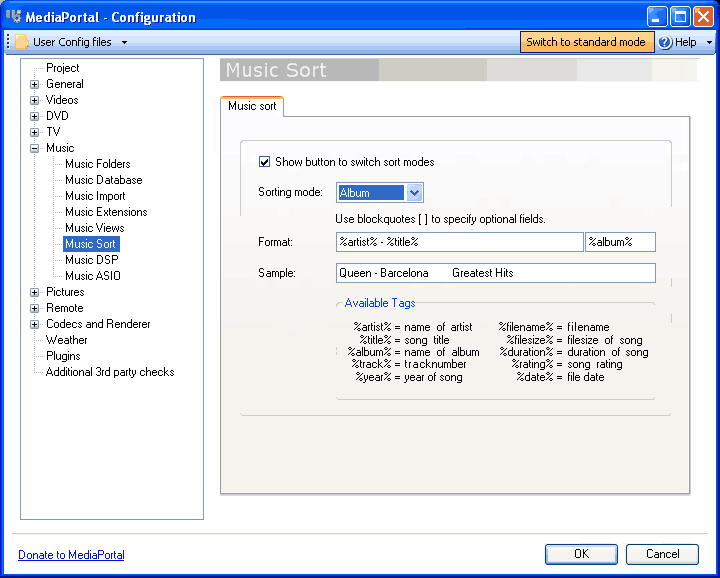
Setup the following music sort field, leave the other ones as default
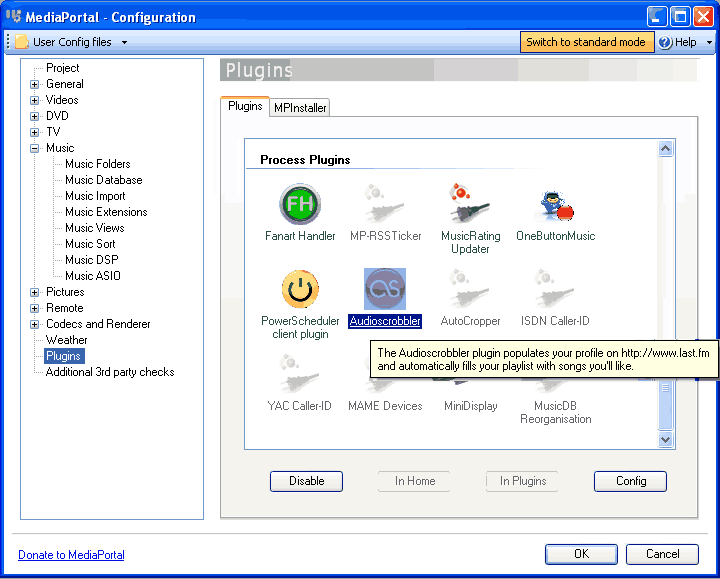
Mediaportal Configuration: Audioscrobber plugin:
You must enable the audioscrober plugin so that you can download images for all the artists. You can also use this to get missing album cover images, however i prefer to manually embed the album art into the mp3 file so i have control over the quality of the album image.
The audioscrober plugin also has an option to automatically add tracks to your playlist based on your listening tastes, and it can update your last.fm page to tell your friends what music your listening to. After audioscrobber plugin has finished you can disable it if you wish, however I prefer to keep it enabled.
Enable audioscrobber plugin and click configure
This screen is for grabbing the artist images
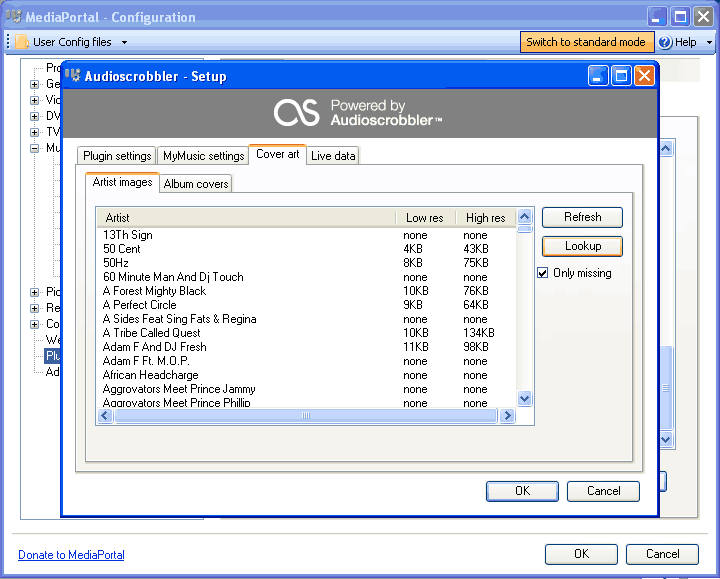
To manually add or change artist images you must locate the \thumbs\music\artists directory
There are two files for every artist, %artist%.jpg and %artist%L.jpg (the %artist%L.jpg file is the large thumbnail pic)
My Music Section: Remote control / Keyboard shortcuts
Keyboard commands:
Press the arrow keys to navigate the music section.
Press page up / page down to navigate up or down a large list
Press the left arrow key to get to the popup menu (blue3wide skin) where you can select the view mode.
Press enter on a highlighted item to browse into that item
Press 'escape' to go backwards
Press 'p' to create a new playlist containing the highlighted item and all subitems.
Press 'y' to add selected item to the current playlist
Press F9 key on a highlighted item to get a special menu with additional options
MCE Remote control:
Press the arrow keys to navigate the music section.
Press the left arrow key to get to the popup menu (blue3wide skin) where you can select the view mode.
Press the Ch+/Ch- buttons on your remote to navigate up or down a large list
Press 'enter' or 'ok' on a highlighted item to browse into that item
Press 'esc' or 'back' or '<-' to go backwards
Press 'play' to create a new playlist containing the highlighted item and all subitems.
Press 'info' or 'more' key to access a special menu and to add an item to the current playlist
Example screenshots of above setup, with the default blue3wide skin:
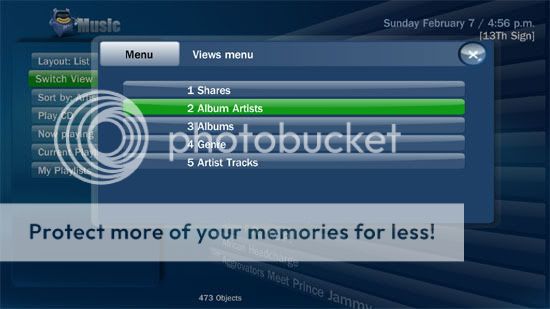
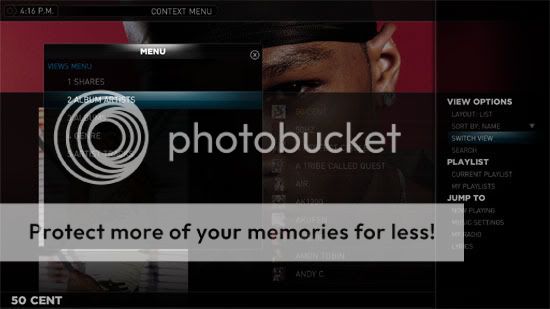
This is the screen where you can choose the view mode.
You will only get nice images if you use database view which uses id3tags.
Shares view is for users who don't use id3tags on their files.
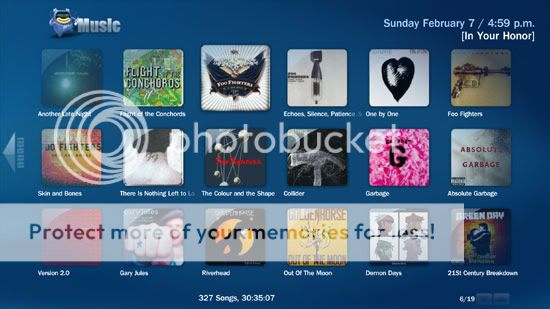
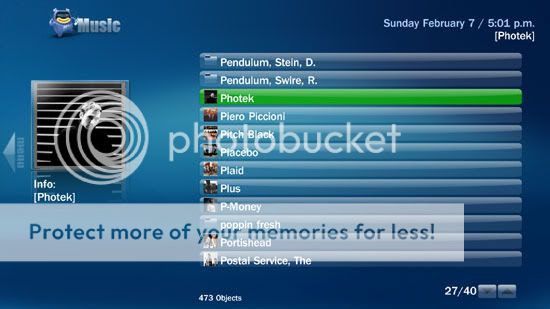
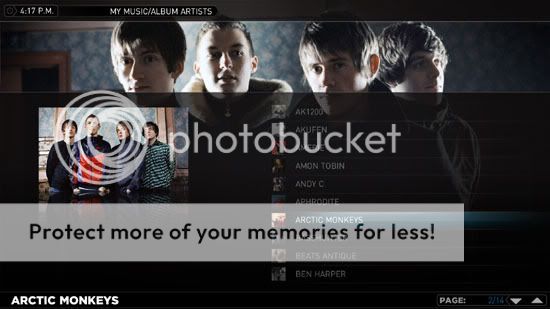
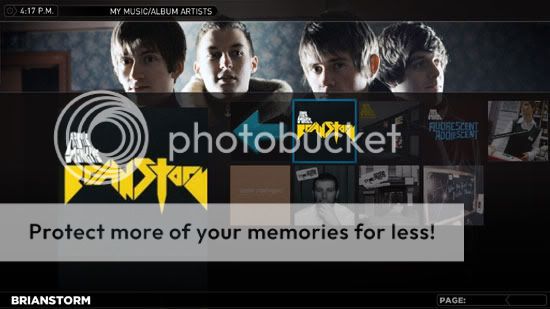
This is album artist view:
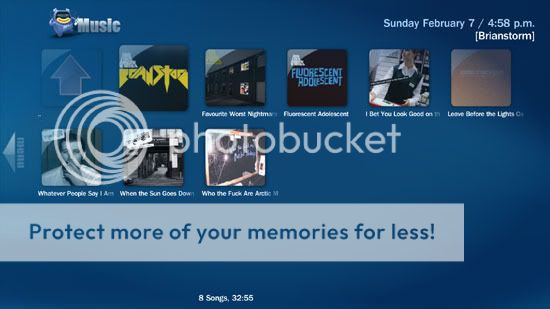
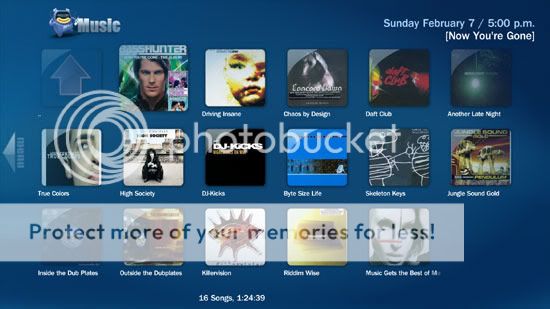
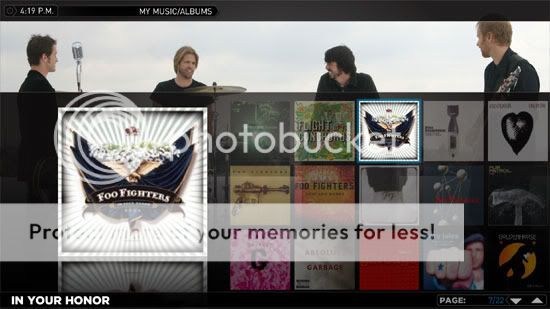
This is album view:

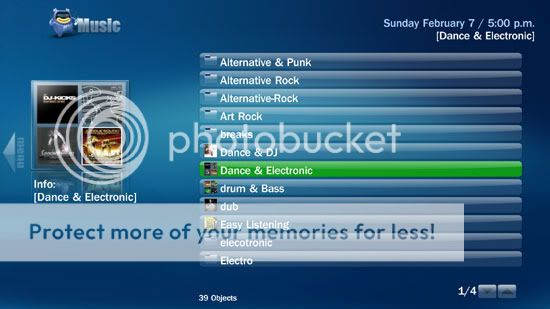
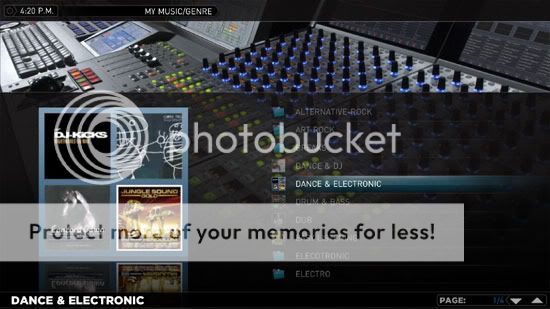
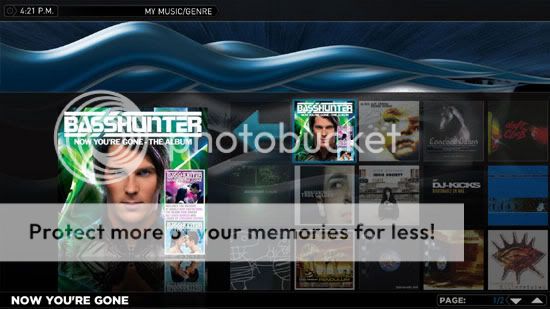
This is genre view:
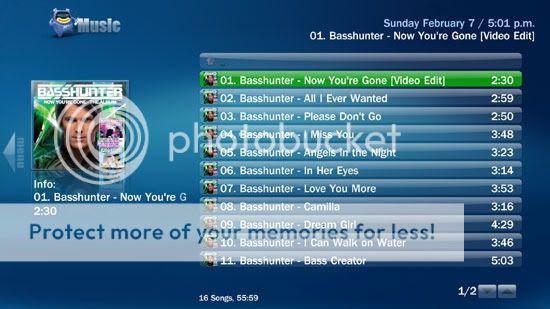
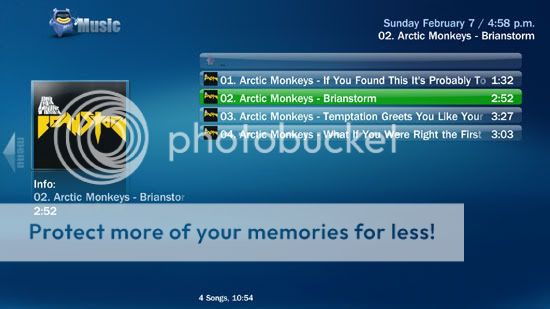
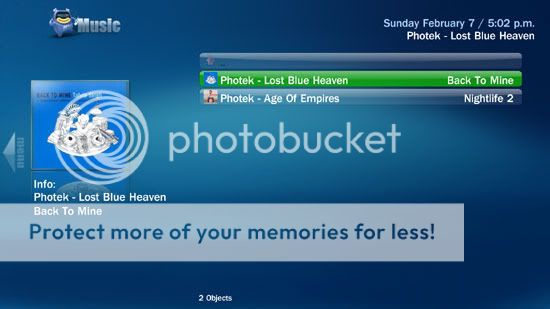
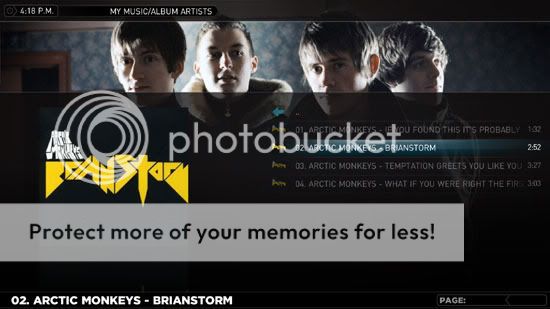
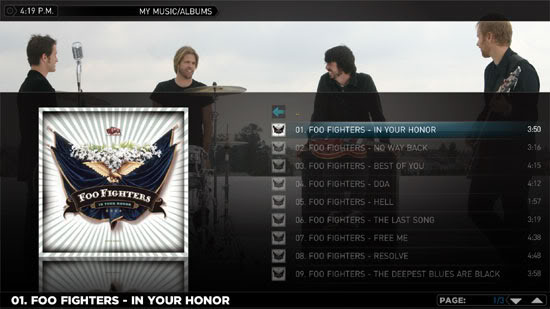
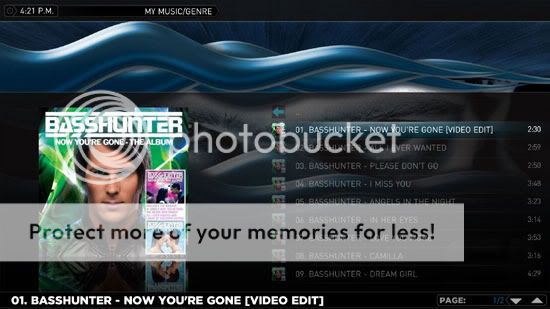
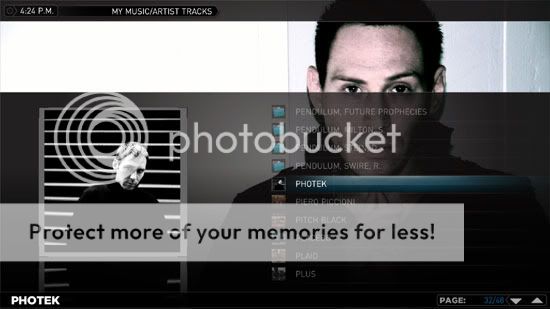
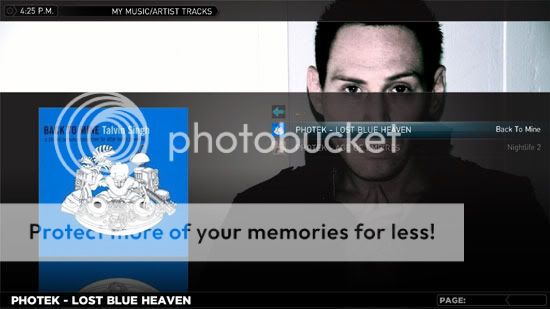
This is artist's tracks view:
Example screenshots of above setup, with streamedmp skin with fanart handler plugin:
StreamedMP is one of the more popular skins, it is very easy to setup (1 click installation), it has a nice menu editor for the home screen. There is a link to download the skin in my signiture. You will notice there is fanart (A high resolution image of the artist) in the background. The fanart handler plugin is required for this, and it will probably integrated into the next official streamedmp release, however if you can't wait there is a thread in the streamedmp skin forum on how to add fanart to the music section.
This is the screen where you can choose the view mode.
You will only get nice images if you use database view which uses id3tags.
Shares view is for users who don't use id3tags on their files.
This is album artist view:
This is album view:
This is genre view:
This is artist's tracks view:
This guide should help a lot of people who get confused how to setup the music view properly.
The most important step is to tag ALL your music files properly.
I also explain how to use the keyboard/remote control to navigate the my music section.
Some people think the music section of mediaportal lets it down, but I think a lot of the users havn't set it up properly.
I don't want the guide to be too complicated so I havn't explained the now playing window/internet lookups for top album tracks. I havn't gone into great detail on how the audioscrobber plugin works. I've just covered how to use it to get artist thumbnails. Explaining the fanart plugin is also beyond the scope of this guide.
Tagging music files:
This guide assumes you have properly tagged music files.
To properly tag your music files I recommend you use mptagthat (free) or tag & rename (30 day trial).
All music files should have the following tags
Artist Name / Album Artist / Album Name / Track Title
- You should embed the album art into every music file.
- If you have all the tracks in an album you should have Track#s tagged.
- If you have an album with multiple cds, you should also have the disc# tagged, leave the album name the same for both cds.
- If it is a 1 cd album then just leave the Disc# tag blank.
- If the album is a compilation album with more than 1 artist then you should use album artist = "various artists".
- If you only have a single music track (ie not from an album), then set the album title = "Singles" and the album artist name should be the same as the track artist name.
Artist = The Smashing Pumpkins
Album Artist = The Smashing Pumpkins
Album Name = Siaemese Dream
Track Title = Cherub Rock
Track# = 01
Disc# = (BLANK)
Album Artist = The Smashing Pumpkins
Album Name = Siaemese Dream
Track Title = Cherub Rock
Track# = 01
Disc# = (BLANK)
Folder & Filename Structure:
This step is optional as the file/folder names don't have any influence on how the music looks inside mediaportal unless you are using the shares view.
For folder and filename structure you should use
\music\<Album Artist>\<Album Name>\<Disc#><Track#> <Artist> - <Title>.mp3
eg. \music\The Smashing Pumpkins\Siamese Dream\01 The Smashing Pumpkins - Cherub Rock.mp3
Remeber, if it is a 1 disc album then just leave the Disc# tag blank.
This folder structure is best, because you can use the exactly the same file/folder name structure for complete albums/incomplete albums/compilation albums/multidisc albums/single tracks.
Mediaportal Configuration: My Music
Tick all the boxes in the screenshot below
Make sure create artist preview thumbs is unticked
Then click update database from selected shares, this will import all your music in the folders ticked above.
It will use the embedded art for the album covers.
Setup the following music views
Album artist
The above music view is album artist view. Each of the lines represents a step when you are browsing the music. So in this view, we will first see all the album artists arranged in a list ordered by name, when we click enter we will then see all the albums belonging to that album artist, with big icons, if we click enter again we will see the music tracks from that album presented as a list. Hopefully you understand what I mean and can make your own views, if not just copy the screenshot exactly =)
Albums
Genres
Aritst tracks
Setup the following music sort field, leave the other ones as default
Mediaportal Configuration: Audioscrobber plugin:
You must enable the audioscrober plugin so that you can download images for all the artists. You can also use this to get missing album cover images, however i prefer to manually embed the album art into the mp3 file so i have control over the quality of the album image.
The audioscrober plugin also has an option to automatically add tracks to your playlist based on your listening tastes, and it can update your last.fm page to tell your friends what music your listening to. After audioscrobber plugin has finished you can disable it if you wish, however I prefer to keep it enabled.
Enable audioscrobber plugin and click configure
This screen is for grabbing the artist images
To manually add or change artist images you must locate the \thumbs\music\artists directory
There are two files for every artist, %artist%.jpg and %artist%L.jpg (the %artist%L.jpg file is the large thumbnail pic)
My Music Section: Remote control / Keyboard shortcuts
Keyboard commands:
Press the arrow keys to navigate the music section.
Press page up / page down to navigate up or down a large list
Press the left arrow key to get to the popup menu (blue3wide skin) where you can select the view mode.
Press enter on a highlighted item to browse into that item
Press 'escape' to go backwards
Press 'p' to create a new playlist containing the highlighted item and all subitems.
Press 'y' to add selected item to the current playlist
Press F9 key on a highlighted item to get a special menu with additional options
MCE Remote control:
Press the arrow keys to navigate the music section.
Press the left arrow key to get to the popup menu (blue3wide skin) where you can select the view mode.
Press the Ch+/Ch- buttons on your remote to navigate up or down a large list
Press 'enter' or 'ok' on a highlighted item to browse into that item
Press 'esc' or 'back' or '<-' to go backwards
Press 'play' to create a new playlist containing the highlighted item and all subitems.
Press 'info' or 'more' key to access a special menu and to add an item to the current playlist
Example screenshots of above setup, with the default blue3wide skin:
This is the screen where you can choose the view mode.
You will only get nice images if you use database view which uses id3tags.
Shares view is for users who don't use id3tags on their files.
This is album artist view:
This is album view:
This is genre view:
This is artist's tracks view:
Example screenshots of above setup, with streamedmp skin with fanart handler plugin:
StreamedMP is one of the more popular skins, it is very easy to setup (1 click installation), it has a nice menu editor for the home screen. There is a link to download the skin in my signiture. You will notice there is fanart (A high resolution image of the artist) in the background. The fanart handler plugin is required for this, and it will probably integrated into the next official streamedmp release, however if you can't wait there is a thread in the streamedmp skin forum on how to add fanart to the music section.
This is the screen where you can choose the view mode.
You will only get nice images if you use database view which uses id3tags.
Shares view is for users who don't use id3tags on their files.
This is album artist view:
This is album view:
This is genre view:
This is artist's tracks view:
