- Moderator
- #1
EDIT: Disregard this tutorial and check out the Wiki page here: Create A Skin Installer - Dadeo has added extra notes which make it easier to follow 
Hi All
This tutorial is based on my experiences with the MPE1 Extension maker and is open to correction. It will probably be moved to the Wiki once it is "finalised". NOTE: Only post questions with regard to this tutorial here, do not post any bugreports in this thread (i.e. where the MPE1 Maker or Installer does something you don't expect), post them here: https://forum.team-mediaportal.com/skins-plugins-installer-mpei-212/extension-installer-v2-71542/
Some things to consider before making an MPE1 file:
1. Make sure your skin is ready to be released. It can get messy if you decide to change things and then create another MPE1 file (it doesn't always create a problem, but it can, especially if you are altering files which are part of an "option" screen in the install process).
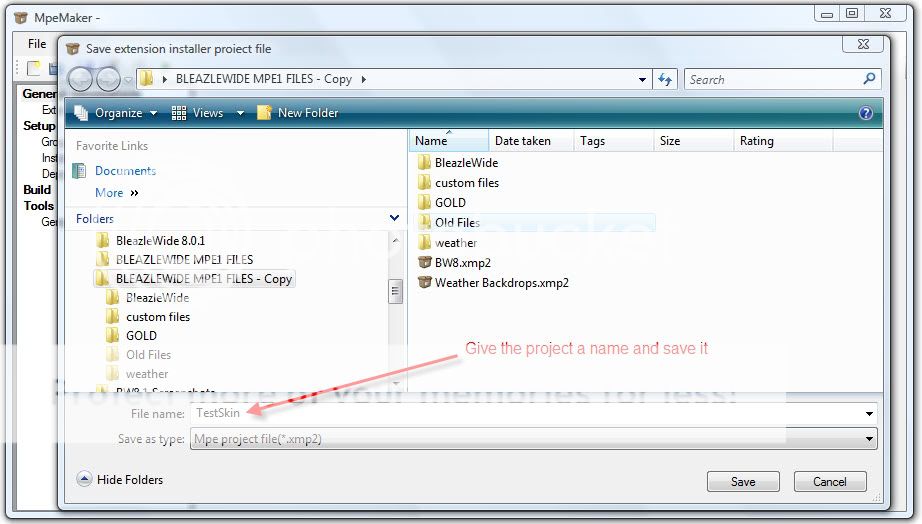
2. Locate ALL of the files to be used in the MPE1 file in one directory, including the XXX.xmp2 file (which is the "project" file) - this helps keep things tidy. The programme "doesn't like it" if you move files, especially the xmp2 file. This includes any font files or plugin dlls that you want to include in the install.
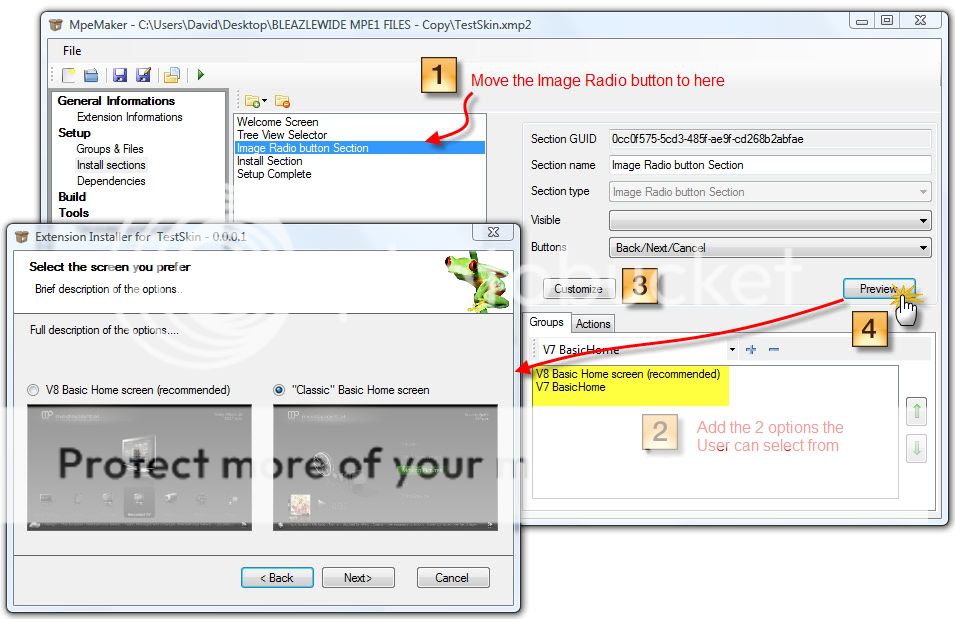
3. If you are going to offer "options" during the install (eg. the choice of 2 BasicHome screens as we do in this tutorial) make sure that the the option that is listed 2nd (i.e. on the right hand side of the "radio button selection screen") was last saved after the option that is listed on the left hand side of the screen - this is VERY IMPORTANT.
Here is a link to the files I used to make this tutorial for anyone that wants to use them as part of the tutorial. RapidShare: 1-CLICK Web hosting - Easy Filehosting Note: These files won't give you a complete version of BleazleWide but you should end up with a skin called "TestSkin" with the fonts and plugins installed and the option of choosing between 2 basic home screens.
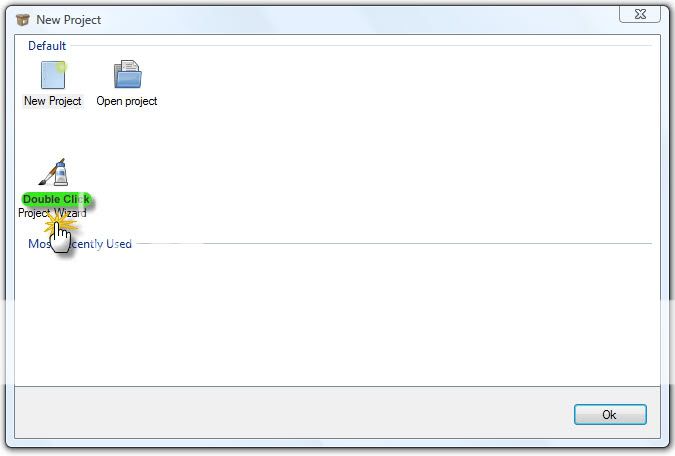
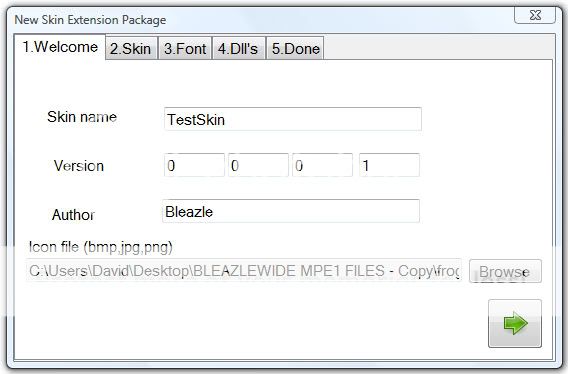
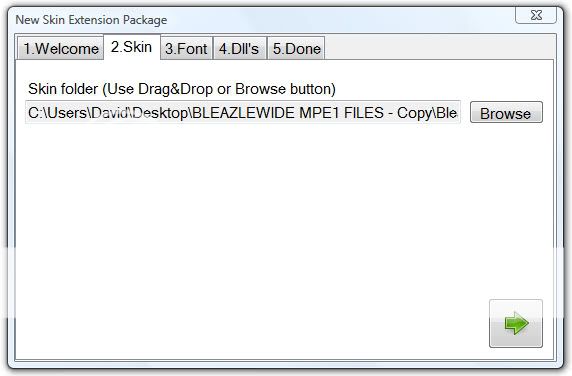
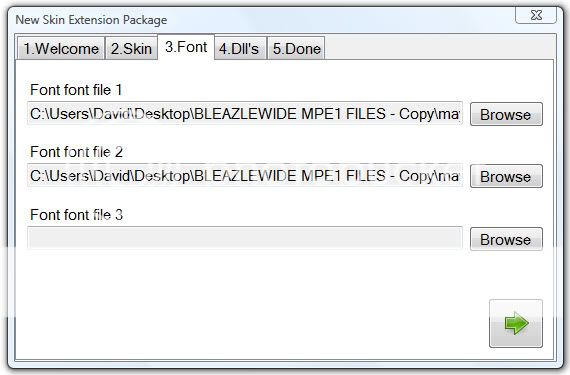
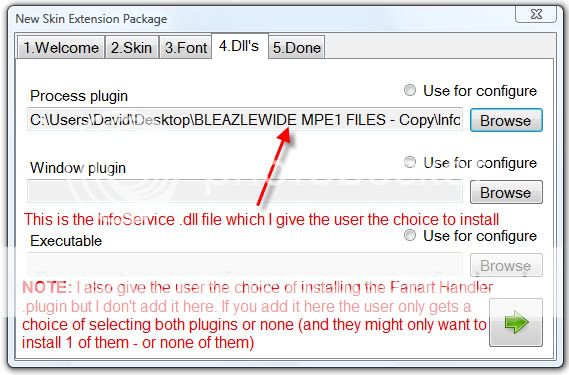
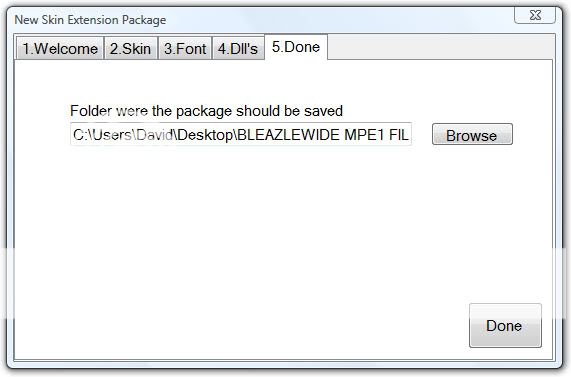
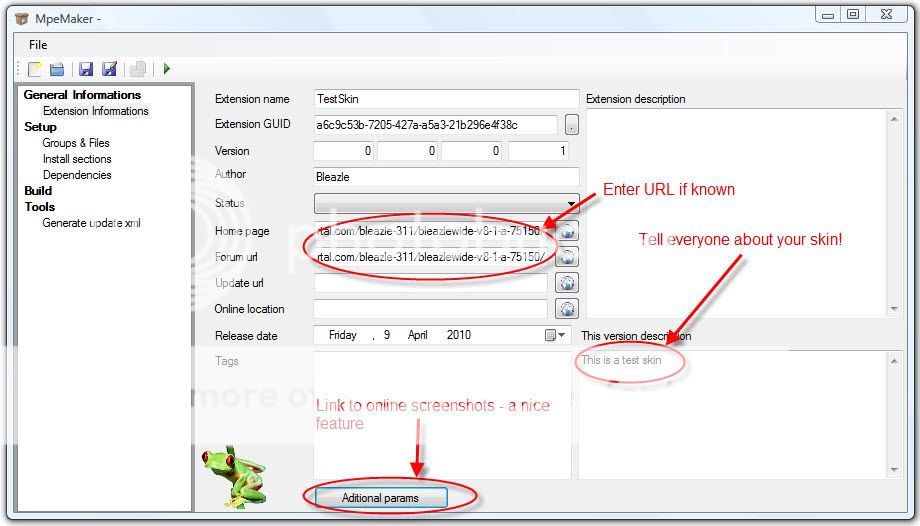
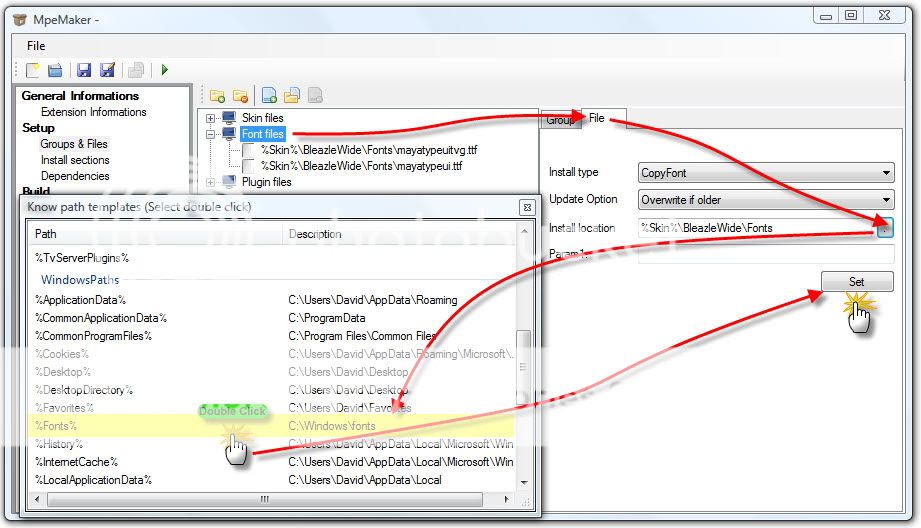
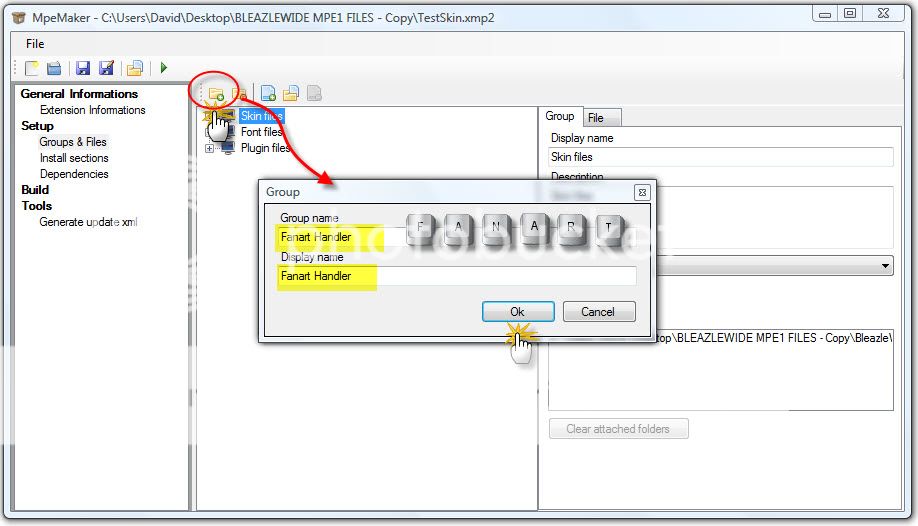
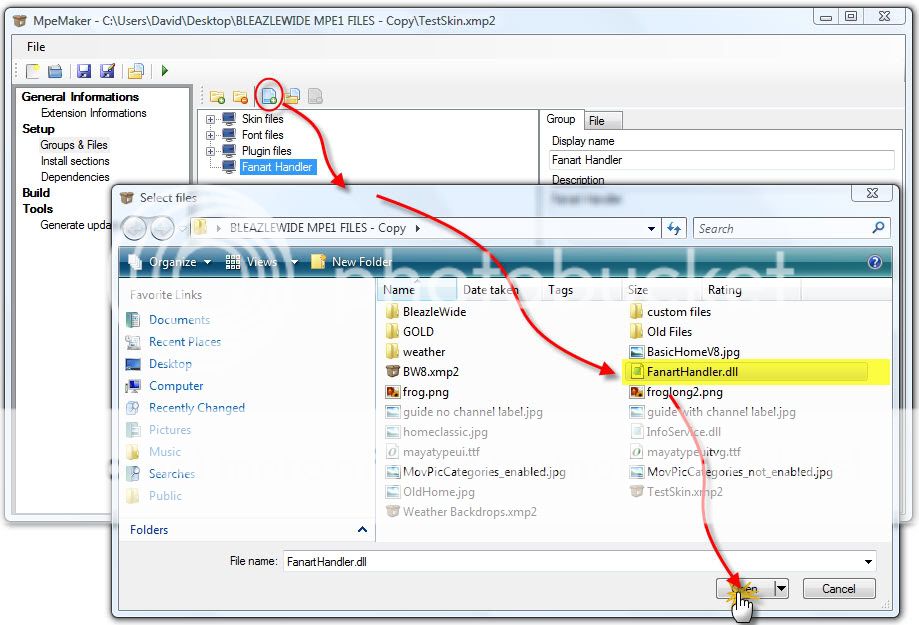
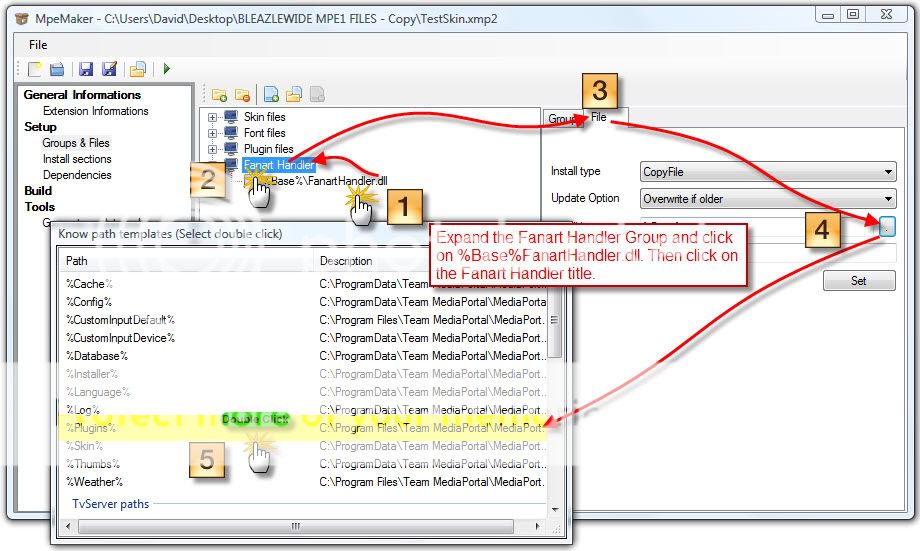
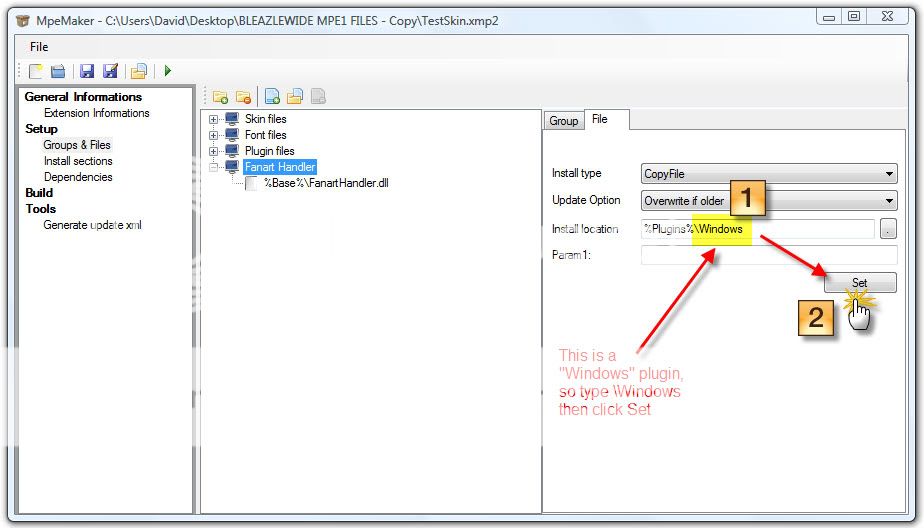
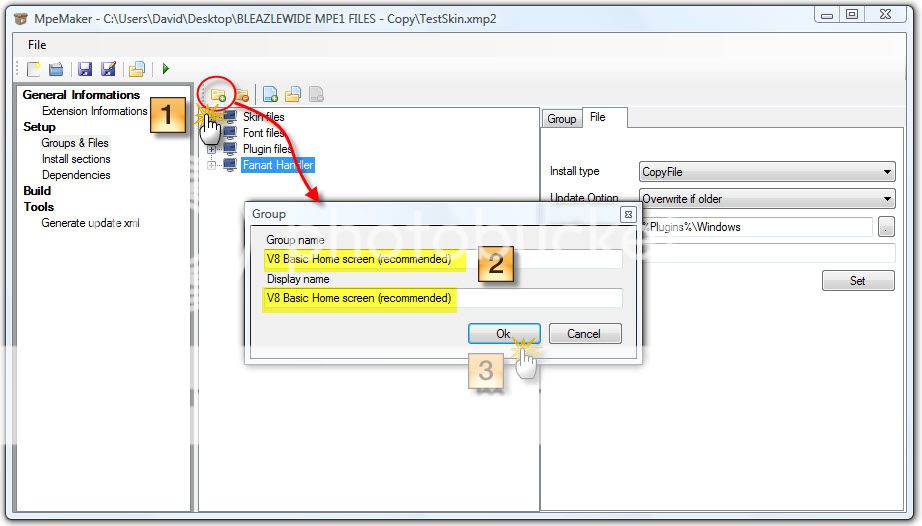
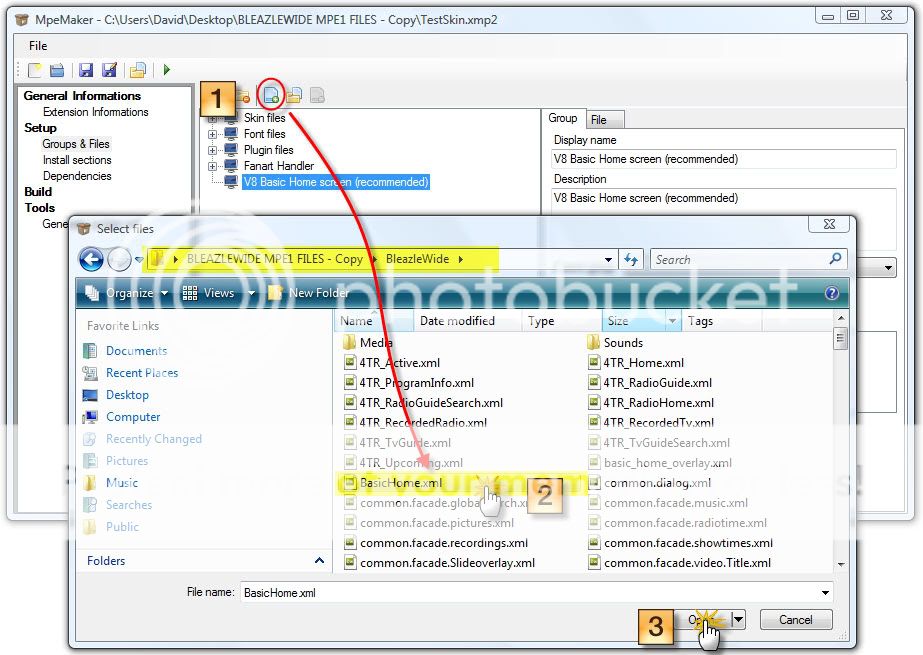
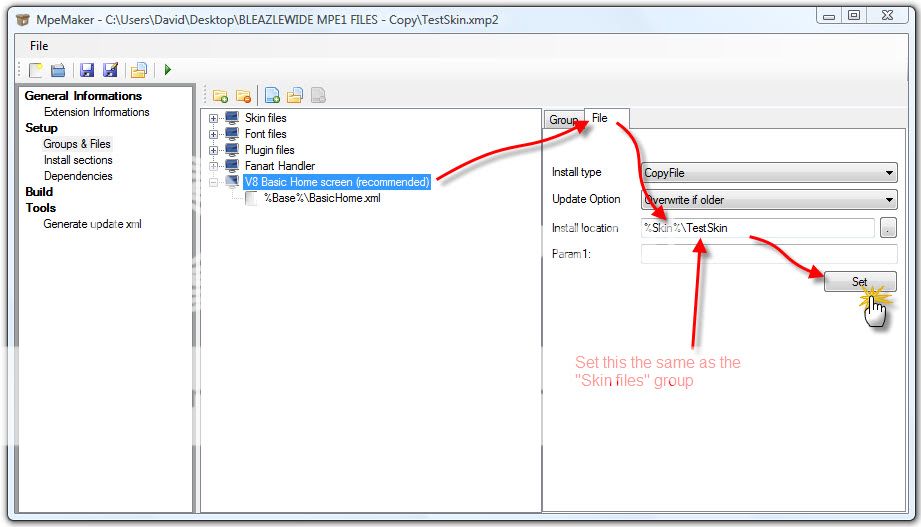
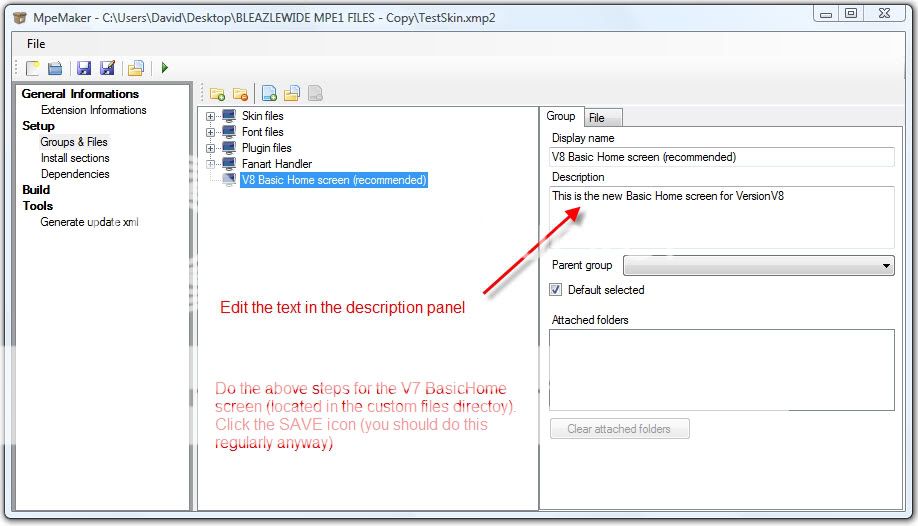
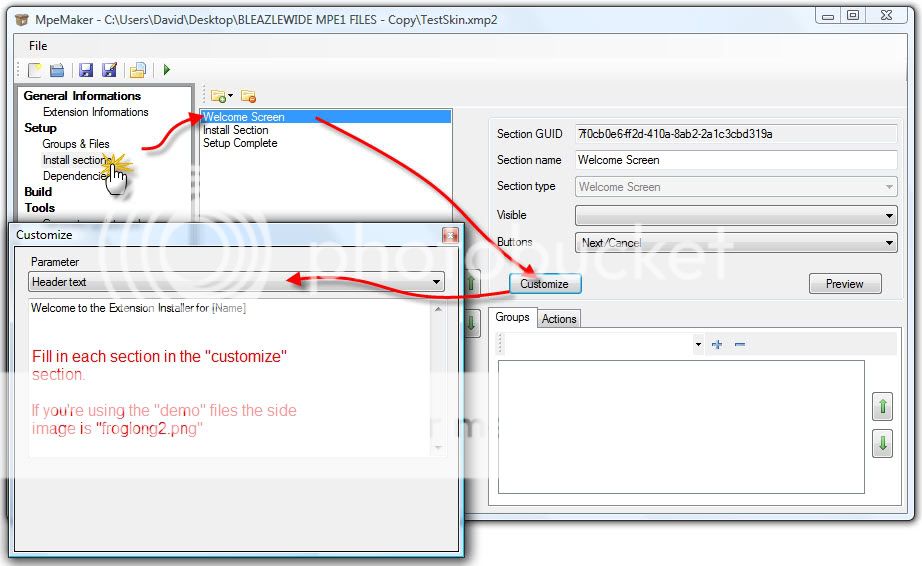
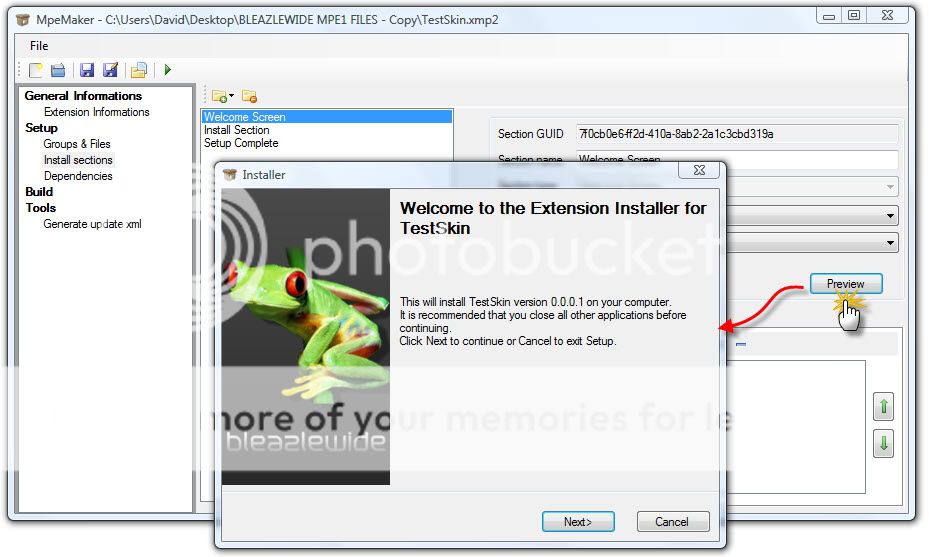
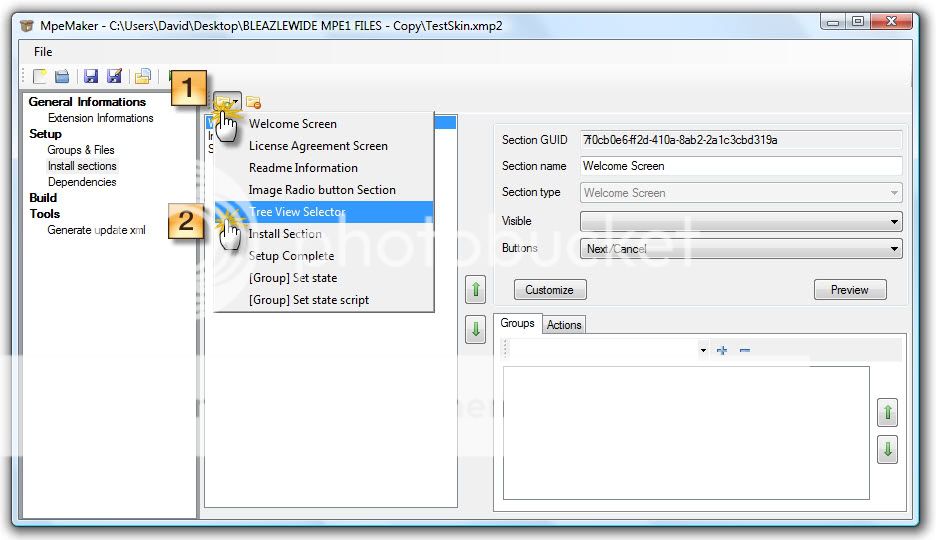
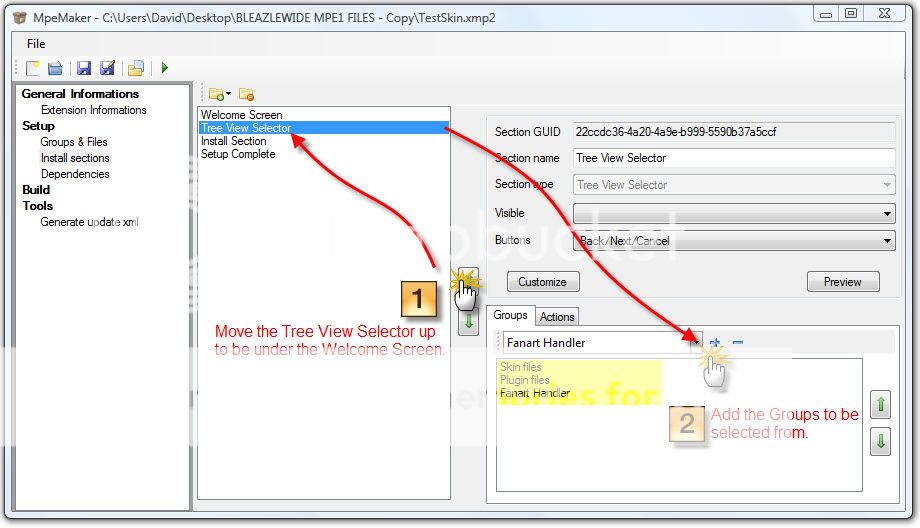
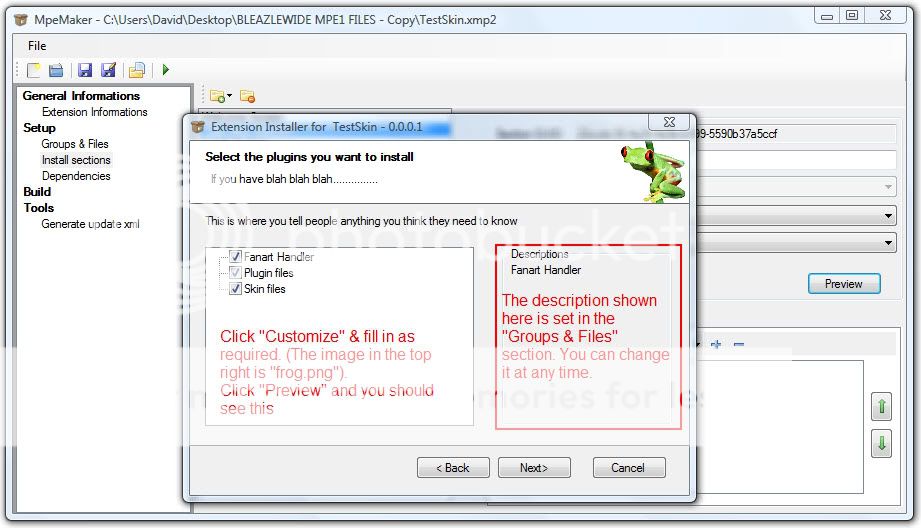
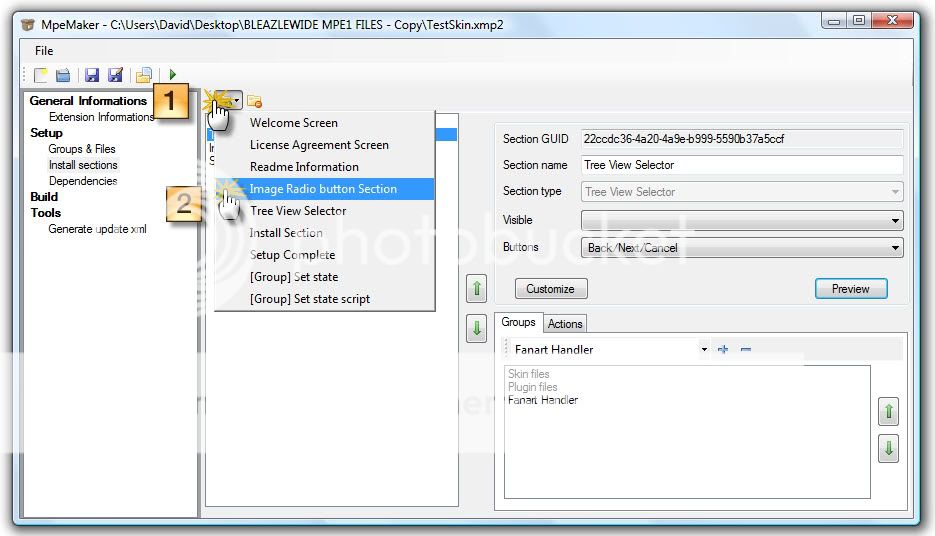
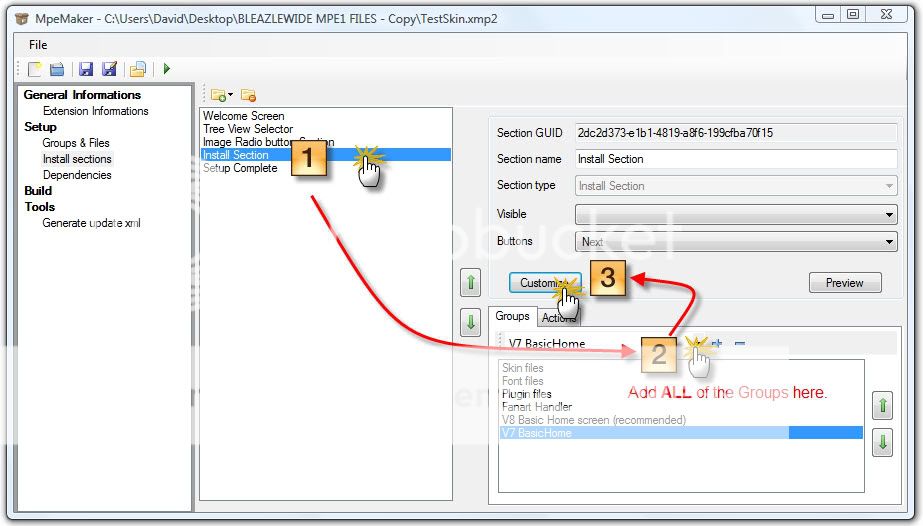
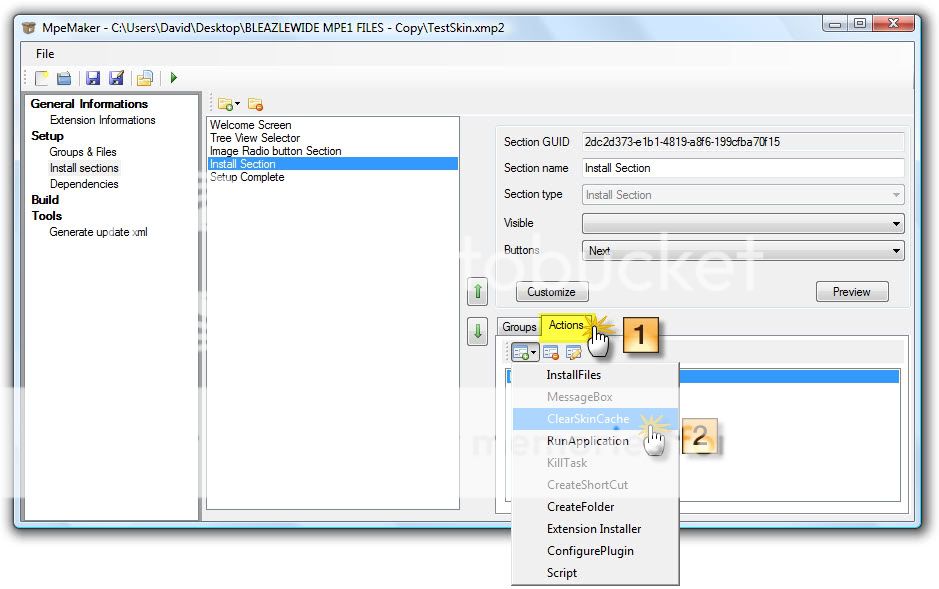
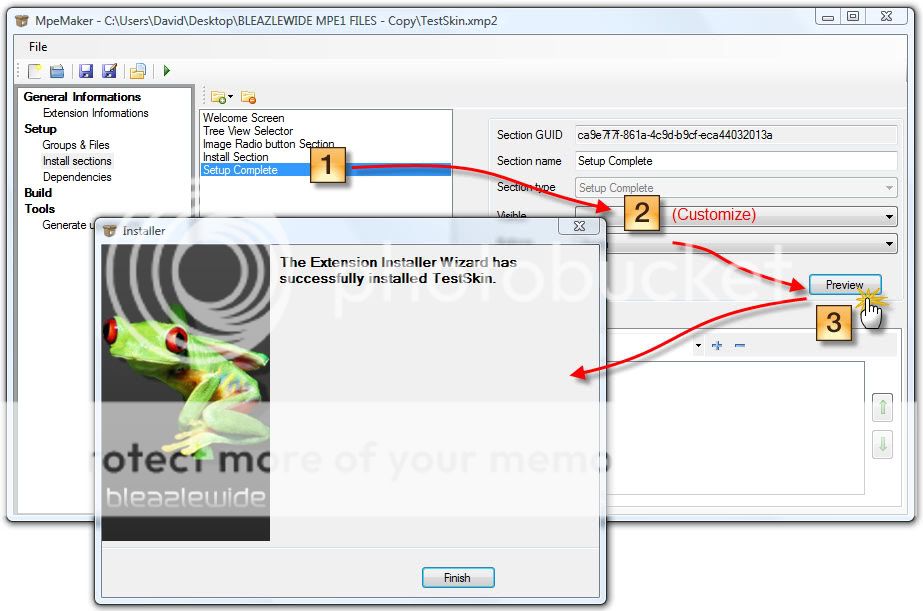
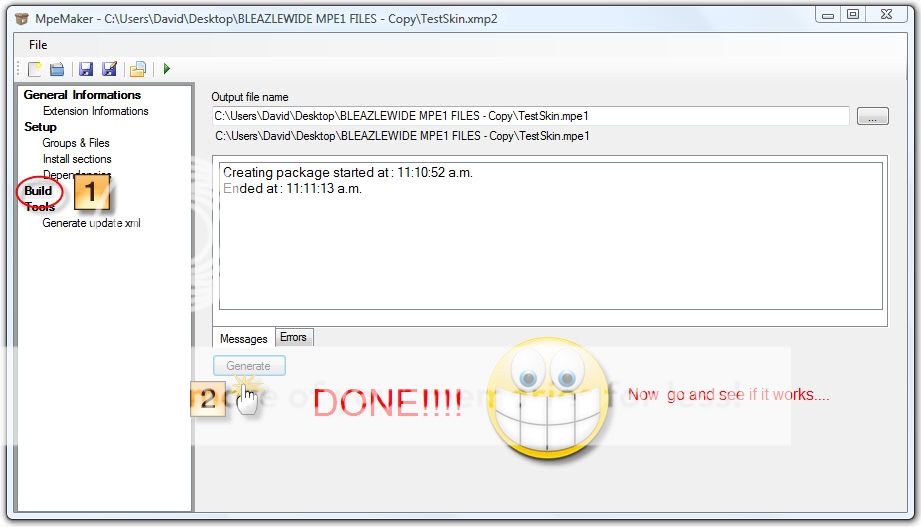
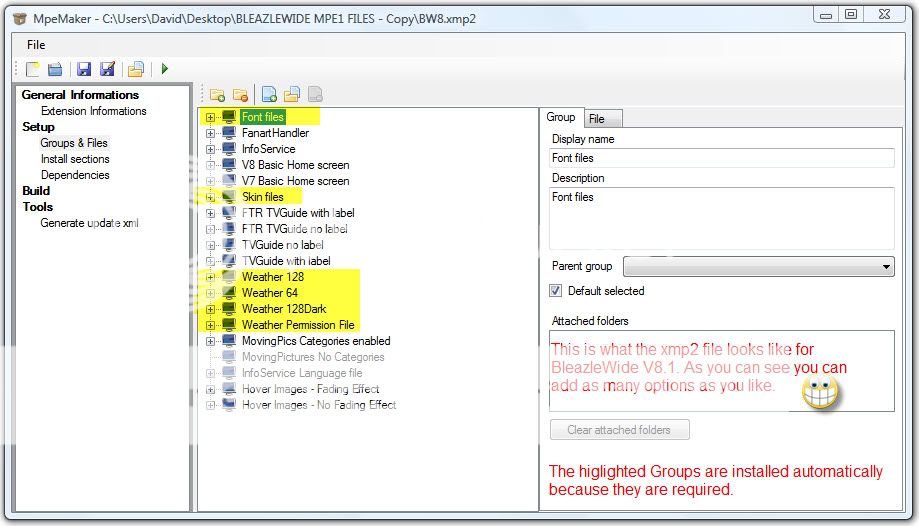
A picture says 1,000 words. I've left out the things that (I think) are obvious. Look at each screen because if I cover something in one screen I don't repeat it later - I assume that "you've got it", otherwise putting this together would have taken even longer than it already has!
1. Open the MediaPortal Extension Maker.
OK, let's go:


 New Zealand