
- January 3, 2008
- 890
- 556
- Home Country
-
 Germany
- Moderator
- #1
Update: The language files are not working for the summer release
I started to write my first plugin and got excited about MP2.
As I had no idea about xaml or MP2 before, I am documenting some steps in learning which may be helpful for others, too.
The following steps describe some basic examples for MP2 and give simple code examples.
The plugin has no real meaning besides demonstrating and testing basic functions in MP2
Before you continue you should have understood the function of the "Hallo World Plugin".
Don´t get frustrated if you did not understand the WIKI MP2 documentation. Many things became more clear after i was going through the following steps.
**************************************************************
Step1: (Closed, source code attached)
**************************************************************
-the plugin MyTestPlugin has a dependency on the Configuration Manager Plugin in plugin.xml
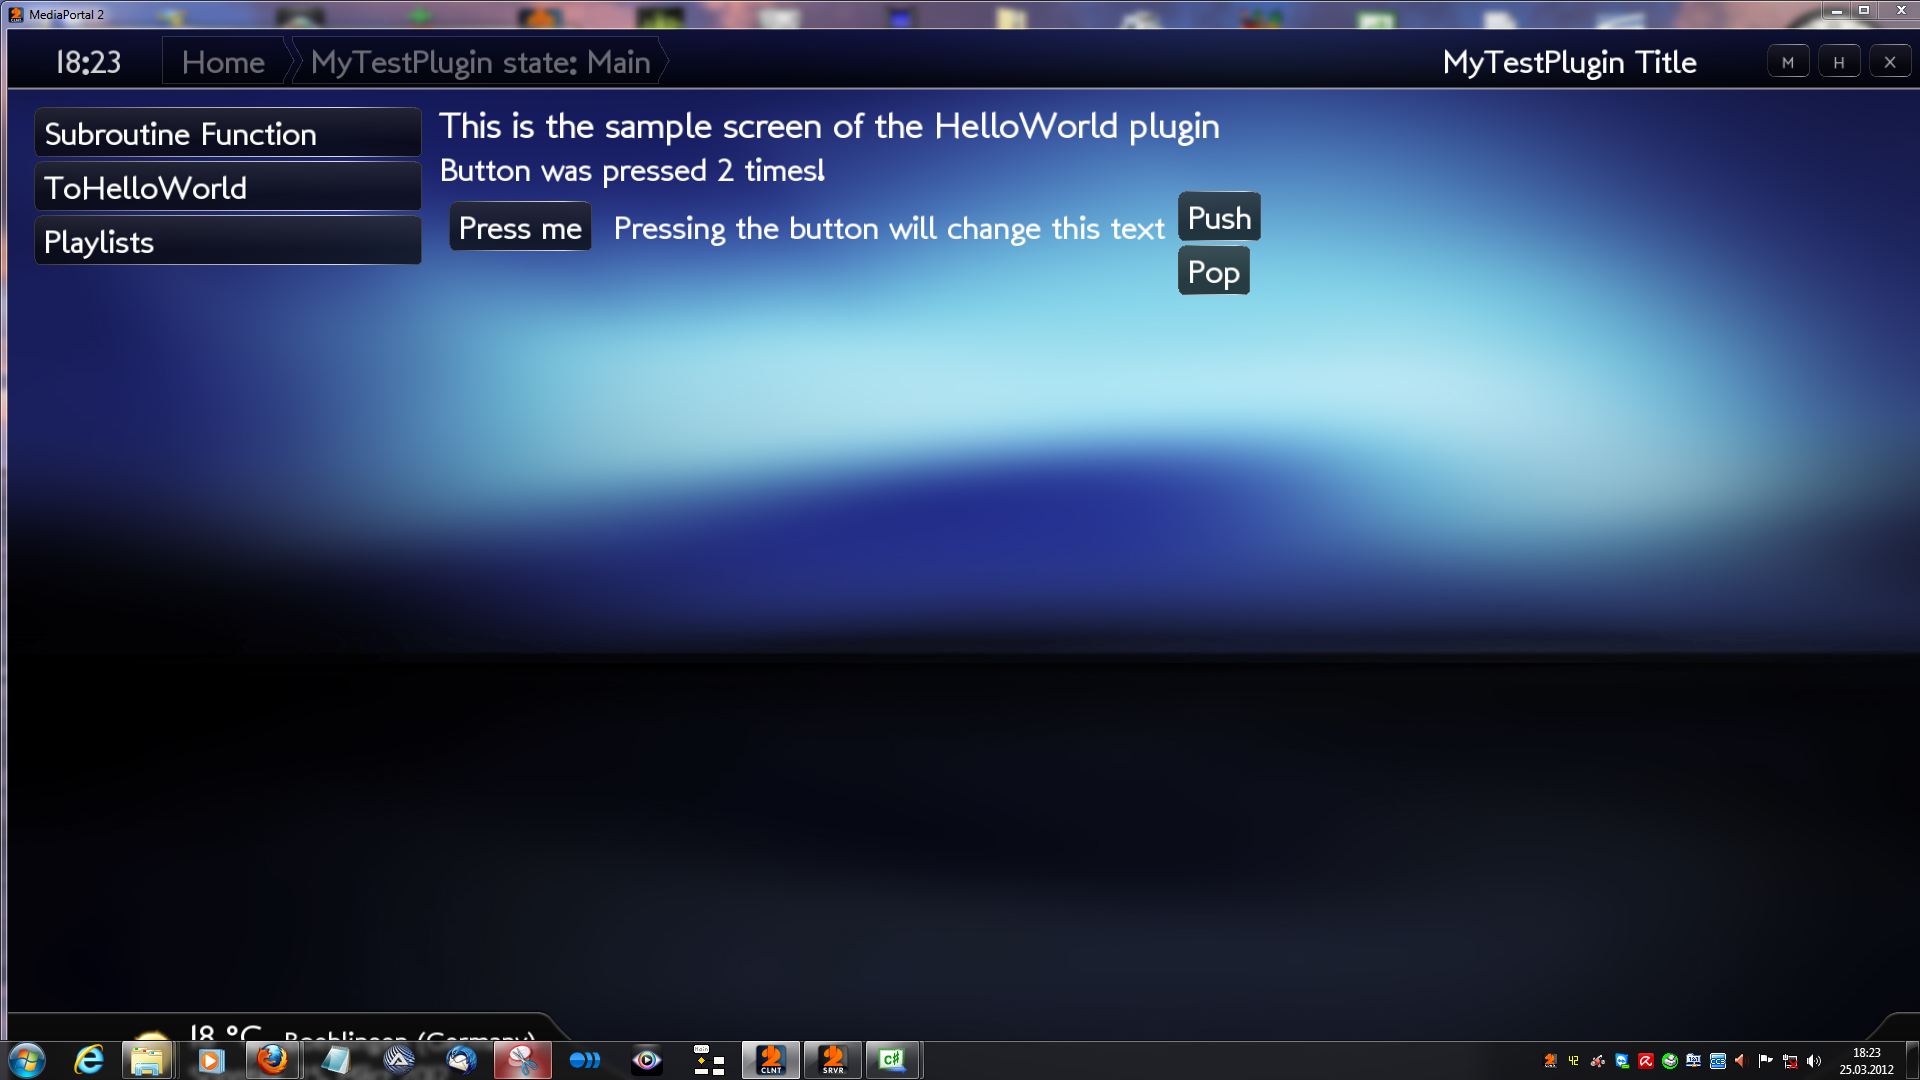
-example for a push navigation button from the MyTestPlugin to the HelloWorldplugin in workflow\MyTestPlugin.xml
-example for a push navigation button from the HelloWorldplugin to the MyTestPlugin in workflow\MyTestPlugin.xml
-example for a function button FunctionButton in workflow\MyTestPlugin.xml
-example for generating a "push" workflow transition (from the MyTestPlugin to the HelloWorldplugin) in the model code triggered by the Push button
-example for generating a "pop" workflow transition (from the MyTestPlugin to the previous screen) in the model code triggered by the Pop button
-example for a button "Press me" toggling a label in the skin
-example for tracing the workflow states using the IWorkFlowModel functions
-example for logging
-cleanup on naming convention
**************************************************************
Step2: (closed, source attached)
**************************************************************
- cleanup on naming convention
- adding config settings to the plugin (string, integer, bool) in the configuration folder. Loadsettings example in the model MyTestPlugin.cs.
- example for messaging when a configuration setting did change(send in the configuration if a string changes its value and receive in the model MyTestPlugin.cs)
- assigning keys/ IR commands to functions in the skin MyTestPlugin.xaml
pressing F1 button (or whatever you configured for MyButton_Key in the configuration) will call the function ChangeHelloWorldString.
- assigning keys/ IR commands to functions in the model MyTestPlugin.cs (Pause key) using the IInputManager which will call the function MyFunctionButton in the model MyTestPlugin.cs
**************************************************************
Step3: (closed, source attached)
**************************************************************
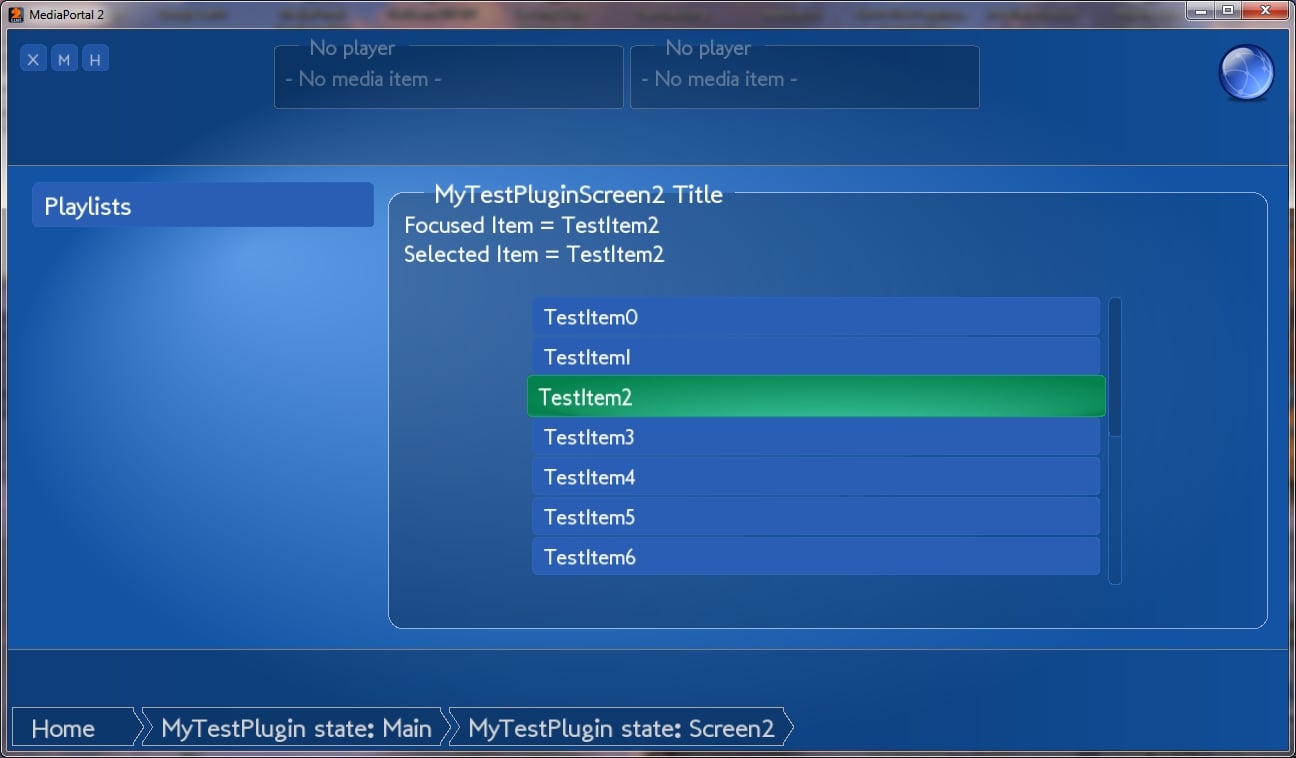
- adding another child skin (MyTestPluginScreen2.xaml and its model MyTestPluginScreen2.cs)
- transition from parent to child and revers (new workflow in workflow\MyTestPlugin.xml)
- listview menu processing (MyTestPluginScreen2.xaml and its model MyTestPluginScreen2.cs)
(The defaultstyle refers to a key "Name" !) the number of listview menu items is determined by the integer in the configuration settings.
- creating an information dialog and watch its closing in the model MyTestPlugin.cs
- creating a dialog menu in the model MyTestPlugin.cs with a derived skin SimpleDialogMenu.xaml
- creating a input textbox dialog which can use the virtual keyboard in the model MyTestPlugin.cs with a skin SimpleDialogTextBoxInput.xaml
**************************************************************
Step4: (closed, source attached)
**************************************************************
- Important: You need to change to the MP2 Easter Build version (only working for default skin)
- Important: You need to have MPExtended to be installed (not working for TV4Home!)
- the Screen2 now implements a gui dialog where the user is asked to select a tv group. Then all channels of the selected Tv group will be displayed in the listitem on screen2. For this the SlimTvInterface was used with its implemented functions from Morpheus. Just register the global _tvHandler in the constructor and use the _tvhandler functions to get an IList of all groups
_tvHandler.ChannelAndGroupInfo.GetChannelGroups(out mygroups)
SimpleMenuDialogScreen2() implements a menu dialog, where the user can select the tv group derived from the dialog in Step3.
-The channel names are obtained in a similar way in InitListItems(). They are displayed as listitems in the skin.
In a similar way schedules and programs can be handled. Look at the SlimTvInterfaces from morpheus_xx
- As there was no definition for TV database settings in SlimTvInterfaces i have created an own class derived from the SlimTvMPExtended class to connect to the Tvserver and read/write data base settings. That´s why step4 needs MPExtended only.
In MyTestPluginMPExtendedProvider.cs the functions
GetConnectedServers(out List<ServerName> serverNames)
ReadSetting(int serverId, string tagName, string defaultValue, out Setting setting)
WriteSetting(int serverId, string tagName, string value)
have been defined in addition to reusing the functions for connecting to the Tvserver from the original code of morpheus_xx. This may become void in the future if morpheus_xx implements the settings in SlimTvInterfaces. As MPExtended supports multiple tv servers the function GetConnectedServers lists all defined and connected tv servers.
-The testplugin uses this class in the main screen and reads a tvserver database setting within the function OnPageLoad and displays the setting "postRecordInterval" whenever the main screen is entered.
The menu dialog is used to select different numbers and write back this setting with the selected value to the tv server database in the function MenuItemSelected(ListItem myitem).
**************************************************************
Step5: (closed, source attached)
**************************************************************
Step 5 gives an example for a process plugin, which will open a dialog box if the workflow changes. It consists of the derived classes
BaseMessageControlledModel, IPluginStateTracker
In contrast to a workflowmodel it will be activated at the beginning and is ideal for implementing a process plugin. This plugin just listens for new messages and opens a dialog box if a new message has been received. Trace the log file to see the actual states from the PluginStateTracker. Check the plugin.xml file to see how the plugin is registered.
I have posted the updated code in the zip file.
Update 6/17/2012:
- updated all the source code and removed a few minor bugs
- removed dependency on TV plugin, as it caused an issue for other skins
I started to write my first plugin and got excited about MP2.
As I had no idea about xaml or MP2 before, I am documenting some steps in learning which may be helpful for others, too.
The following steps describe some basic examples for MP2 and give simple code examples.
The plugin has no real meaning besides demonstrating and testing basic functions in MP2
Before you continue you should have understood the function of the "Hallo World Plugin".
Don´t get frustrated if you did not understand the WIKI MP2 documentation. Many things became more clear after i was going through the following steps.
**************************************************************
Step1: (Closed, source code attached)
**************************************************************
-the plugin MyTestPlugin has a dependency on the Configuration Manager Plugin in plugin.xml
-example for a push navigation button from the MyTestPlugin to the HelloWorldplugin in workflow\MyTestPlugin.xml
-example for a push navigation button from the HelloWorldplugin to the MyTestPlugin in workflow\MyTestPlugin.xml
-example for a function button FunctionButton in workflow\MyTestPlugin.xml
-example for generating a "push" workflow transition (from the MyTestPlugin to the HelloWorldplugin) in the model code triggered by the Push button
-example for generating a "pop" workflow transition (from the MyTestPlugin to the previous screen) in the model code triggered by the Pop button
-example for a button "Press me" toggling a label in the skin
-example for tracing the workflow states using the IWorkFlowModel functions
-example for logging
-cleanup on naming convention
**************************************************************
Step2: (closed, source attached)
**************************************************************
- cleanup on naming convention
- adding config settings to the plugin (string, integer, bool) in the configuration folder. Loadsettings example in the model MyTestPlugin.cs.
- example for messaging when a configuration setting did change(send in the configuration if a string changes its value and receive in the model MyTestPlugin.cs)
- assigning keys/ IR commands to functions in the skin MyTestPlugin.xaml
pressing F1 button (or whatever you configured for MyButton_Key in the configuration) will call the function ChangeHelloWorldString.
- assigning keys/ IR commands to functions in the model MyTestPlugin.cs (Pause key) using the IInputManager which will call the function MyFunctionButton in the model MyTestPlugin.cs
**************************************************************
Step3: (closed, source attached)
**************************************************************
- adding another child skin (MyTestPluginScreen2.xaml and its model MyTestPluginScreen2.cs)
- transition from parent to child and revers (new workflow in workflow\MyTestPlugin.xml)
- listview menu processing (MyTestPluginScreen2.xaml and its model MyTestPluginScreen2.cs)
(The defaultstyle refers to a key "Name" !) the number of listview menu items is determined by the integer in the configuration settings.
- creating an information dialog and watch its closing in the model MyTestPlugin.cs
- creating a dialog menu in the model MyTestPlugin.cs with a derived skin SimpleDialogMenu.xaml
- creating a input textbox dialog which can use the virtual keyboard in the model MyTestPlugin.cs with a skin SimpleDialogTextBoxInput.xaml
**************************************************************
Step4: (closed, source attached)
**************************************************************
- Important: You need to change to the MP2 Easter Build version (only working for default skin)
- Important: You need to have MPExtended to be installed (not working for TV4Home!)
- the Screen2 now implements a gui dialog where the user is asked to select a tv group. Then all channels of the selected Tv group will be displayed in the listitem on screen2. For this the SlimTvInterface was used with its implemented functions from Morpheus. Just register the global _tvHandler in the constructor and use the _tvhandler functions to get an IList of all groups
_tvHandler.ChannelAndGroupInfo.GetChannelGroups(out mygroups)
SimpleMenuDialogScreen2() implements a menu dialog, where the user can select the tv group derived from the dialog in Step3.
-The channel names are obtained in a similar way in InitListItems(). They are displayed as listitems in the skin.
In a similar way schedules and programs can be handled. Look at the SlimTvInterfaces from morpheus_xx
- As there was no definition for TV database settings in SlimTvInterfaces i have created an own class derived from the SlimTvMPExtended class to connect to the Tvserver and read/write data base settings. That´s why step4 needs MPExtended only.
In MyTestPluginMPExtendedProvider.cs the functions
GetConnectedServers(out List<ServerName> serverNames)
ReadSetting(int serverId, string tagName, string defaultValue, out Setting setting)
WriteSetting(int serverId, string tagName, string value)
have been defined in addition to reusing the functions for connecting to the Tvserver from the original code of morpheus_xx. This may become void in the future if morpheus_xx implements the settings in SlimTvInterfaces. As MPExtended supports multiple tv servers the function GetConnectedServers lists all defined and connected tv servers.
-The testplugin uses this class in the main screen and reads a tvserver database setting within the function OnPageLoad and displays the setting "postRecordInterval" whenever the main screen is entered.
The menu dialog is used to select different numbers and write back this setting with the selected value to the tv server database in the function MenuItemSelected(ListItem myitem).
**************************************************************
Step5: (closed, source attached)
**************************************************************
Step 5 gives an example for a process plugin, which will open a dialog box if the workflow changes. It consists of the derived classes
BaseMessageControlledModel, IPluginStateTracker
In contrast to a workflowmodel it will be activated at the beginning and is ideal for implementing a process plugin. This plugin just listens for new messages and opens a dialog box if a new message has been received. Trace the log file to see the actual states from the PluginStateTracker. Check the plugin.xml file to see how the plugin is registered.
I have posted the updated code in the zip file.
Update 6/17/2012:
- updated all the source code and removed a few minor bugs
- removed dependency on TV plugin, as it caused an issue for other skins
Attachments


Last edited:
