Guide: Perfect playback & Display calibration (1 Viewer)

kiwijunglist

Super Moderator
  • Team MediaPortal
  • June 10, 2008
    6,746
    1,751
    New Zealand
    Home Country
    New Zealand New Zealand
    About this guide

    There are two versions of this guide.

    1. The Quick 5min Setup Guide

    Use this is you don't want to spend more than 5 minutes setting things up. It is good for novice users. I will give you the most important settings for best quality picture and buttery smooth playback with out wasting time with explanations or customization. If you have any problems you should refer to the Full setup guide.

    2. The Full Setup Guide

    This is for people who don't mind spending a bit more time getting things perfect. The full setup guide is divided into the following chapters.

    Display calibration - overscan / 1:1 pixel mapping
    Make your picture to be as sharp as possible with the video extending right to the edge of the screen

    Display calibration - black levels / white Levels / clipping
    Setup your display so that black is black while still having excellent detail in dark scenes.

    Display calibration - colour / sharpness
    Fine tune your display so that skin tones are perfect and there are no artifacts.

    Video playback - matching source fps to display Hz
    Make video playback buttery smooth in MediaPortal with no microsutter on panning shots

    Video playback - eliminating tearing
    Ensure you never see tearing with fast moving video frames

    Video playback - hardware acceleration
    Setup video hardware acceleration to take the strain of your cpu to ensure your video is always smooth and your HTPC uses less power.

    Video playback - blu ray discs
    How to setup MediaPortal to play bluray discs

    Audio - bitperfect playback of music
    Setup the MP to ensure the highest fidelity of music playback

    A quick note about SAF & other codec packs

    I've been asked a lot about SAF codec pack. If you want to install SAF you can still do this and then follow my guide. SAF is just LAV + a lot of additional filters (PDVD,FFDShow,MPC-HC,Real Media) it also changes the direct show merits, however this doesn't matter as MP (by default) ignores the merit values (Automatic Decoder Settings = Disabled). Both my HTPCs had SAF installed prior to writing the guide. I don't think SAF is required for online videos, as I am pretty sure that LAV can play all the online video formats. If you do have problems playing real media files, online videos or some other obscure format, then it may be of benefit to install SAF prior to following the guide. SAF would be the only codec pack that I recommend, if you have other codecs please uninstall them, sometimes the only way to recover from the mess of installing multiple codec packs is to format the PC. I recommend most users stick to LAV (+/- SAF) only.

    You can download SAF here:
    http://hobring.esero.net/saf/binary/

    A quick note about Operating Systems

    I recommend everyone stick to Windows 7, 32bit or 64bit and hold off upgrading their HTPCs to Windows 8. I see a higher proportion of playback problems on the forums from Windows 8 users. However that doesn't mean you can not get perfect playback using these OS's. I expect the Windows 8 related problems will improve over the next 6 months. I tried Windows 8 on my main HTPC, but went back to Windows 7.

    A quick note about Running Multiple Monitors

    I Recommend you don't run multiple monitors with MediaPortal... BUT... If you do, then you should run the tv as the primary monitor. If you can't run the TV as the primary monitor, then disable vsync, disable DRR and set the tv refresh rate to the same refresh rate as you monitor (60hz).

    PS.

    I am no longer actively supporting this thread (due to work commitments) but there are lots of other users who are happy to answer your questions in this thread. Also any team members are welcome to tweak/edit my posts to add additional information. Cheers -Kiwi
     
    Last edited:

    kiwijunglist

    Super Moderator
  • Team MediaPortal
  • June 10, 2008
    6,746
    1,751
    New Zealand
    Home Country
    New Zealand New Zealand
    Quick 5 minute Setup Guide

    Follow these instructions if you just want to quickly setup the most important settings as fast as possible, for almost perfect playback without any additional explanations or customizations. If you have any problems please see the full guide.

    Video Card Configuration:

    We want to disable most of the enhancement options in the graphics card drivers.
    However, the most important thing here is to set vsync to always on/force.
    See screenshots below for each type of graphics card.

    AMD:
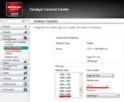
    Open ATI Cayalyst control center by right clicking on the desktop.
    Change the following settings (as per screenshots)

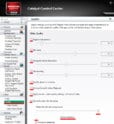
    Digital Flat Panel, Scaling Options: Overscan = 0%
    Note with overscan you must set overscan to 0% for every refresh rate you will use eg 23,24,50,60..
    Video, Advanced Video Colour: Everything disabled
    Video, Quality: Everything disabled (Deinterlacing = Vector Adaptive)
    Gaming, 3D Settings: Wait for vertical refresh (Vsync) = Always On

    quick-amd01.jpg


    quick-amd02.jpg


    quick-amd03.jpg

    NvidiaImageSettings.jpg

    quick-amd04.jpg
    Nvidia:
    Overscan = 0%

    NvidiaScaling.jpg


    Vertical Sync = Always On / Forced

    NvidiaVSync.jpg


    Disable all video + image enhancements

    NvidiaImageSettings.jpg


    ** Need someone to show me all the settings, so I can make screenshots **
    Intel:
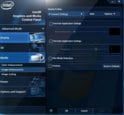
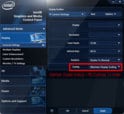
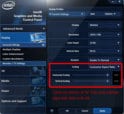
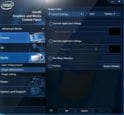
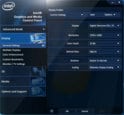
    General Settings: Scaling = Maintain aspect scaling
    Media Image Enhancement: Disable film mode detection. Override Sharpness/Noise reduction + set to zero.
    3D: Vertical Sync = Always On

    intel-overscan1.jpg


    vsync-intel.jpg
    Mediaportal Configuration:

    quick-mpconfig01.jpg


    If MP internal refresh rate changer doesn't work click here

    quick-mpconfig02.jpg


    LAV Video Configuration:

    quick-lav-video.jpg


    AMD HD4XXX / HD5XXX - Choose DXVA2 (native)
    AMD HD6XXX / HD7XXX - Choose DXVA2 (copy back) [If stutter problems change to native]
    Low End Nvidia - Choose DXVA2 (native)
    High End Nvidia - Choose Nvidia CUVID + adaptive HW deinterlacing, output: 50p/60p (or) DXVA2 (native)
    Intel - Choose Intel QuickSync + adaptive HW deinterlacing, output: 50p/60p
    Low end GPU that doesn't do HW accleration, choose none

    LAV Audio Configuration:
    quick-lav-audio01.jpg


    It doesn't matter if you use HD-Audio / HDMI audio / Digital Co-axial / Optical SPDIF / RCA - you must disable bitstreaming so we can decode everything for MPAR. Trust me you will not lose out on quality we are using the all powerful mediaportal audio renderer!!!!! MPAR can output HD audio via PCM. We also don't want A/V Sync correction in LAV!!!

    Audio LAV 2.gif


    Mediaportal Audio Renderer (MPAR) Configuration:

    quick-mpar.jpg


    Calibrate TV:

    Download 1-black clipping.zip and extract to your mediaportal videos folder
    Play "1-black clipping.mp4" in mediaportal
    Decrease TV brightness to 0%
    Increase TV brightness until you can faintly see that #17 is flashing

    quick-brightness.jpg


    You've Finished the Quick 5 minute Setup Guide

    If you had problems, remember to consult and run through the full guide before asking questions...

    .
     

    Attachments

    • sharpness-intel.JPG
      sharpness-intel.JPG
      54.9 KB
    • 1-Black Clipping.zip
      14.6 MB
    Last edited by a moderator:

    kiwijunglist

    Super Moderator
  • Team MediaPortal
  • June 10, 2008
    6,746
    1,751
    New Zealand
    Home Country
    New Zealand New Zealand
    Full Setup Guide

    Overscan, Underscan, and 1:1 pixel Mapping

    Introduction
    Underscan is where the image from the computer has a black border around it on the tv
    Overscan is where the image from the computer extends beyond the edges of the tv
    0% overscan is where the image from the computer perfectly touches the edges of the tv
    1:1 pixel mapping is where 1 pixel on the computer corresponds to 1 pixel on the tv
    Most tvs if not setup correctly will overscan (zoom) the image from the computer, so you can't see the edges.

    calib01.jpg


    _over.jpg


    _under.jpg


    For picture quality 1:1 pixel mapping is the most important.
    For being able to see the whole image without wasting any pixels we want 0% overscan.

    Pixel Mapping is the most important, with most TVs you will get 0% overscan with 1:1 pixel mapping, on some TVs you may be missing a 1-2 pixel on the left/right/bottom, so even though you have 1:1 mapping you technically have a tiny amount of overscan/underscan, however you wouldn't want to correct for this because then you loose your 1:1 pixel mapping. If you are missing a pixel or two, don't correct for this in MP screen calibration, leave the pixels off the edge of the screen.
    Underscan: Desktop doesn't reach the edge of the tv.
    Overscan: Desktop extends beyond the edge of the tv.

    Your desktop resolution should already be set to your display's native panel resolution.

    Full HD 1080P TV: 1920x1080 resolution
    HD Ready TV: Consult tv manual/manufacturer for the native panel resolution, and also read "Notes for other displays"
    Computer Monitor: Don't need to worry about pixel mapping or overscan, see "Notes for other displays"

    How to check if you have 0% overscan and 1:1 pixel mapping

    Download overscan.test.patterns.zip
    Run TigerDave.exe, this will display the test pattern in full screen with 100% zoom.
    The arrows should touch the edge of the screen
    calib01.jpg
    If you put your eyes right up to the TV you should see straight even 1 pixel width lines
    All the lines should be exactly the same width and brightness, if some lines are very slightly different widths or shades of red to the others you do not have 1:1 mapping
    If there is a slight pattern to the lines that repeats every #th line then you do not have 1:1 mapping
    View this sample image below on your computer monitor (*NOT* your TV) to see what 1:1 mapping looks like
    calib04.gif
    Another way to see what 1:1 mapping looks like is to view 1920x1080.gif in your image viewer, now zoom in + out slightly and look really closely at what the stripes do at different zoom levels.

    Initial adjustments to try and get 0% overscan with 1:1 pixel mapping
    1. Go into Video card settings
      AMD = Catalyst control centre, NVIDIA = nvidia control panel
      Check your display resolution is set to the native panel resolution (ie 1920x1080)
      Adjust overscan/underscan to 0%
      amd_overscan.gif intel-overscan1.jpg
    2. Run tigerdave.exe
    3. Keep changing the display mode (16:9,4:3,14:9 Zoom,etc) on your tv, until you the arrows touch the edge of the screen.
      On a samsung tv this display mode is called "Just Scan" on a panasonic I think it is called "HD Size"
      Note: usually "16:9 mode" has overscan in it. Not all TVs can do 0% overscan

    Help My TV can't do 0% overscan or 1:1 pixel mapping
    1. Run tigerdave.exe (doesn't matter which one)
    2. Set the tv's display mode that shows as much as possible of the tigerdave1080p test pattern (eg. 16:9 mode)
    3. Go into video card settings and adjust the overscan/underscan slider.
      Give enough underscan so that you can see as much as possible WITHOUT any black border.
      It doesn't matter if some of the image is still cut off we will fine tune this in the next step.
      amd_overscan.gif intel-overscan2.jpg
    4. Run Mediaportal and go into settings -> GUI -> Screen -> Screen calibration.
    5. Fine tune the display so the blue arrows touch the edge of the screen.
    Note for other displays
    • If you have an HD Ready display with a 1280x720 native pixel panel you should use 1280x720 as your desktop resolution and then use TigerDave.1280x720.exe to adjust for 1:1 mapping and overscan.
    • You can only use TigerDave.1280x720.exe if your desktop resolution is 1280x720
    • If your resolution is not 1280x720 you can set your desktop background to white, and move your mouse pointer into the top left corner of the screen and use that as a guide for adjusting overscan.
    • You can also use "5-sharpness & overscan.mp4" inside "basic calibration.zip" in the next post. Play the video fullscreen then adjust overscan settings.
    • If you have an HD Ready display that is not 1280x720, it's always best to try setting the desktop resolution to same as the native resolution of the panel. This doesn't always work with some panels. If you can't use the native panel resolution, the next resolution to try is 1280x720.
    • If you have an old TV are forced to choose between 1080i and 720p desktop resolution, always pick 720p. Don't use interlaced desktop resolutions, they will not give you smooth playback.
    • If you have an HD Ready TV and can't find your native display panel resolution then use 1280x720
    • If you have a computer monitor, it does not suffer from non 1:1 mapping, overscan or underscan as long as the display resolution = native monitor resolution
     

    Attachments

    • overscan.test.patterns.zip
      3.7 MB
    Last edited:

    kiwijunglist

    Super Moderator
  • Team MediaPortal
  • June 10, 2008
    6,746
    1,751
    New Zealand
    Home Country
    New Zealand New Zealand
    Black levels, White levels, clipping, 0-255 vs 16-235

    Introduction
    Computers and computer monitors use 255 shades of black/grey/white (0-255)
    Blurays, DVDs, Video cameras, TV Broadcasters and TVs use 219 shades of black/grey/white (16-235)
    Photos and Digital Cameras use 0-255

    Video cards can be set to only output 16-235, but often they still use 0-255 internally prior to output, and they either cut off 16 shades of grey at each end, or they re-compress the signal.

    There is no hard and fast rule as to what color space you use as each has advantages/disadvantages depending on your unique combination of TV and video card. Different combinations handle everything different making it impossible to recommend a combination without running a lot of tests and writing 20 a page guide just for this section... However...

    The most important thing with an HTPC is
    1. Black video looks black
    2. White video looks white
    3. You can tell the difference between black level 17-black level 20, ie you have good detail in dark scenes.
    4. Contrast is enough, but not too high that you get tierd eyes while watching a movie

    These are the options available to you
    PC: Pixel Format 4:4:4 vs Full RGB vs Limited RGB (Don't bother with 4:2:2)
    PC: Colour range 0-255 vs (16-235 if supported)
    LAV Codec: 16-235 vs 0-255 output
    TV: 16-235 mode (vs 0-255 if supported by TV)

    My current setup is
    AMD: Full RGB 4:4:4 pixel format with Full colour range (0-255) and 32bit colour / LAV: 0-255 (RGB32bit only) / TV: 0-255 (with Samsung HDMI Black Level = Normal)
    This gives me full range of black:white with desktop,pictures & video as well as black=black in both photos and the expanded video. Since video colour space is expanded I get slight compression artifacts in greyscale ramp test videos, however what ever combination I use I still can see compression artifacts (I suspect video card internally uses 0-255 regardless of settings), so I use a combination that gives me good colour space in both desktop, photos and videos.

    What we will attempt to do is make sure that black is as black as possible, white is as white as possible, while still maintaining excellent contrast in black/dark scenes.

    NB: I have made a desktopclipping.gif test pattern, you can use it for advanced colour space management when investigating how your tv and video card handles different colour spaces. If you don't understand how to use it then just ignore this file. This file might be useful if you want to prevent clipping in both photos and videos. It is still important that you set the brightness level using the mp4 file within MediaPortal. Don't use desktopclipping.gif to adjust your final brightness level as you will might make movies lose contrast and you may spoil your video black level
    1. Set everything to LAV in mediaportal

    LAV.jpg


    Download Basic Video Calibration.zip

    Download Basic Calibration.zip and extract to your MediaPortal videos folder.
    It is important that we view these files in MP not your external video player.

    Turn off all extra enhancements on the TV

    Make note of your current TV settings just in case
    Reset your tv to the default picture settings. (Reset contrast, brightness, colour etc)
    Set picture mode to normal/standard mode (If you don't have this then use 'movie' mode)
    Set colour mode to standard/normal/default.
    Now turn off all the fancy modes that it does, we don't want them
    This means no dynamic contrast, edge enhancement, noise reduction, smoothing, auto colour, auto contrast, auto black levels, picture enhancement, DNIe, interpolation, Pull:down detection, etc...

    Turn off all extra enhancements on the Video card

    AMD:
    ati.jpg

    Nvidia:
    ** someone send me a picture **

    Intel:
    sharpness-intel.JPG

    Adjust the black clipping level

    Play 1-Black Clipping.mp4
    There is flashing in all bars, however you only want to see flashing in 17 and above.
    Turn brightness on your tv down to 0%
    As you turn up the brightness you will see 25 flashing, then 24, then 23,22...
    Keep going higher until you can just faintly see that #17 is flashing

    What about 0-16 flashing? Well all proper video rips and iso rips have no colour information from 0-16 and above 235. If you turn up the brightness higher you will not see any extra detail in movies, and the black will become greyish, you also might loose details at the white end, because brightness is too high.

    Play 2-APL Clipping.mp4
    Ensure that you can see #17 is flashing, if not you may need a couple of extra steps of brightness

    quick-brightness.jpg


    Adjust the white clipping level

    Some tv's have "white level" some tv's have "contrast". White clipping is less important as there are hardly any video scenes that have detail in white, whereas it's quite common to have an almost black scene with action happening.

    Play 3-White Clipping.mp4
    Make note of the default/current contrast/white level.
    Ideally you should see flashing in bars 234/235 and below
    Now adjust from 0%-100% see if this has any effect on the flashing white bars.
    at 100% you should see no flash bars, at 0% you should see flashing from 230-234
    You want white level / contrast as high as possible while still being able to see 234 is flashing.

    If adjust contrasting does not change the flashing then set contrast back to the original level. You can't adjust contrast on this machine using test patterns, you have to base it on what looks good to you. If contrast is too dark you wont see any details, if contrast is too high then you will get artifacts and sore eyes.

    Downloads:
    Basic Calibration.zip - contains the mp4 videos you need to calibrate your display
    Desktopclipping.gif / Desktopgreylevels - only for desktop colour clipping, do not use this to calibrate your video black levels!!!
    It is important that you download basic calibration.zip and use that to calibrate rather than the .gif images.
     

    Attachments

    • desktopclipping.gif
      desktopclipping.gif
      162.1 KB
    • desktopgreylevels.gif
      desktopgreylevels.gif
      115.6 KB
    Last edited:

    kiwijunglist

    Super Moderator
  • Team MediaPortal
  • June 10, 2008
    6,746
    1,751
    New Zealand
    Home Country
    New Zealand New Zealand
    Colour Calibration

    Will write something in here later, I'm open for suggestions on best way to calibrate colour by eye with or without a blue filter.
    (but if you want proper calibration you have to buy a display calibration kit.)

    Sharpness

    Make note of the current/default sharpness setting on your TV
    Play "5-Sharpness & Overscan.mp4"
    If sharpness is too high you will get white edging around the black boxes
    If sharpness is too low then the fine lines will get a bit muddled.
    On my TV I just leave sharpness at it's default setting
    If you read a lot of text / webpages on your HTPC you probably want sharpness to be on the higher side of normal.

    Checking overscan inside MediaPortal

    We can check we have no overscan/underscan problems within MP by playing "5-Sharpness & Overscan.mp4".
    The things to check within mediaportal are:
    View Mode = Normal (Press F9 -> View Mode -> Normal)
    Clipping is disabled (Watch Live TV -> Press F9 -> Clipping -> 0 pixels)
    Screen UI is not clipped (Settings -> GUI -> Screen -> Screen calibration = 0,0)

    Re-adjust

    After changing all the colour settings, you may find you have to go back and readjust the brightness/contrast again.
     
    Last edited:

    kiwijunglist

    Super Moderator
  • Team MediaPortal
  • June 10, 2008
    6,746
    1,751
    New Zealand
    Home Country
    New Zealand New Zealand
    Video Playback - Matching source fps to display hz

    Introduction

    A movie is just a collection of static images played one after each other really quickly.
    The speed at which the images in a movie change are called video frame rate or video frames per second (fps).
    The speed at which the images on the monitor/tv change is called the display refresh rate (hz)

    Generally computer monitors use 59/60hz
    PAL TVs use ~50hz / NTSC TVs use ~60hz
    Video can be pretty much anything (23.976fps , 24 fps, 25fps, 29.97fps, 30fps, 48fps, 50fps, 60fps)
    Most modern TVs can do ~24hz ~50hz and ~60hz ; some TVs might manage 23.976hz

    We are going to do two things to make playback buttery smooth
    1. We will make the frequency at which the display updates as close as possible to the frequency at which the video updates. We do this using dynamic refresh rate in mediaportal.
    2. We will speed up or slow down the video very slightly so that the video fps is exactly the same as the display hz. We do this using mediaportal audio renderer.
    Check what frequency your display can handle

    Open your video card/display settings in windows and try out the following refresh rates 23.976hz,24hz,50hz,60hz (if available)
    eg. Full HD 1080p: 1920x1080x23.976hz, 1920x1080x24hz, 1920x1080x50hz ,1920x1080x60hz

    AMD:
    ati2.jpg

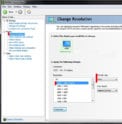
    Nvidia:
    nvidia-resolution.jpg

    Intel:
    intel-desktopproperties.jpg

    You may find that you have to readjust the overscan every time the refresh rate changes. However after you click apply next time you try that resolution+hz it will remember that you want overscan set to 0%.

    If your TV jumps out of 0% overscan mode, then you may find that you have to use a different HDMI port on the tv. This happens with my Samsung TV if I label HDMI2 as "PC". Some TVs may always jump out of picture/view mode whenever the refresh rate changes, if you have this problem contact the manufacturer.

    After we know what the TV can handle we can enable dynamic refresh rate in mediaportal

    Enabling Dynamic Refresh Rate (DRR)

    drr.jpg


    suggested_drr.gif


    If you have problems changing the internal refresh rate you can try enabling force change and device reset.
    If the internal refresh rate changer doesn't work then see here for using an external utlity.

    Sometimes you will be able to get refresh rates you couldn't get in video card settings.
    You can try to a different refresh rate not supported by video card settings, eg. 23.976hz
    What will happen is:
    1. Your TV will switch to 23.976hz
    2. Your TV will switch to the closest compatible refresh rate, eg. 24hz
    3. Your display goes black and you have to reboot PC + turn on + off TV
    4. You break your TV - never heard of this happening, if don't want to risk then only use what was available earlier.

    Testing dynamic refresh rate (DRR)

    Load Several Videos in mediaportal with different fps rates and check nothing wierd happens when your display changes refresh rate. If there are problems you should search the forums for advice. The solutions involve ticking the device reset box or force refresh rate change, or using an external utility outside of MP to change the refresh rate.

    If you press Shift+1 in mediaportal it will tell you the current refresh rate of the display and fps of the movie

    drr.png


    Setting up MediaPortal audio renderer (MPAR)

    The most important things are:
    1. LAV = audio decoder and MPAR = audio renderer
    2. LAV Audio filter has bitstreaming/pass-through disabled. If the audio is decoded rather than passed directly then MPAR can change the audio playback speed to match the display's refresh rate.
    3. LAV Audio filter has A/V sync correction disabled (because we correct for A/V sync in MPAR)
    4. MPAR filter has vsync adjustment + timestretch enabled.
    5. LAV Output format, keep all boxes are ticked unless you receiver doesn't support one of them.
    The other settings you can experiment with or leave them with what I have suggested. I think it's best to disable mixing unless you only have stereo speakers, in which case it is mandatory to downmix so that you can still hear the dialog audio from the center channel. DRC means that LAV will boost the audio volume in quiet scenes, it's only useful if you watch tv at night with the audio down low. Convert output to standard channel layouts (Mono, Stereo, 5.1, 6.1, 7.1) fills non-existent channels with silence (required by some HDMI receivers). Convert 6.1 to 7.1 means the back center channel gets doubled into both back channels. The LFE mix levels only effect down mixing into stereo.

    mpar01.jpg


    LAV Audio Settings:

    Audio LAV 1.gif


    Audio LAV 2.gif


    If you want to decode DTS-HD audio then you need to install Arcsoft TMT5 trial version then copy dtsdecoderdll.dll from the arcsoft directory and paste it into the LAV x86 directory next to lavaudio.ax

    tmt5.jpg


    MPAR Settings:

    Audio MPAR.gif


    It's probably best to leave sample rate and bitrate on auto to prevent un-necessary resampling. You should right click on the volume icon in the system tray, and click play back devices. Ensure that your device has all the supported birates/sample rates enabled, windows will let you test each one. If you hear crackles, hisses or pops then disable that sample rate/bitrate. SRC_Sync_Best is the best audio resampler (but if your audio devices supports all sample rates, then no re-sampling will be done if set to auto mode). If AC3 mode is set to auto then MPAR will encode audio into AC3 when the # audio channels matches the # speakers (defined in MPAR settings). Exclusive mode should be enabled to prevent windows interfering with the channel layout and sample/bit rates.

    EDIT: If you use HDMI then AC3 should be disabled

    In this screenshot we can see MPAR and DRR are working perfectly

    mpar05.jpg
     
    Last edited:

    kiwijunglist

    Super Moderator
  • Team MediaPortal
  • June 10, 2008
    6,746
    1,751
    New Zealand
    Home Country
    New Zealand New Zealand
    Video Playback - Eliminating Tearing

    tearing.jpg


    Introduction:
    Video tearing occurs when a new image is sent to the display before it has finished displaying the current image. It can occur with fast horizontal movement, such as panning horizontal shots. MediaPortal requires vertical sync (vsync) to be on to be able to use the vsync option in LAV/MPAR (We use MPAR is our guide). This means that the video card will not send a new frame until the display has finished displaying the current video frame.
    To eliminate tearing you need to enable Vsync in the video card settings:

    AMD:
    vsync01.jpg
    For troubleshooting if you still experience tearing after changing this setting + restarting your PC, try enabling triple buffer as well, let me know in the comments if that helps.

    Nvidia:
    vsync-nvidia.jpg

    Intel:
    vsync-intel.jpg
     
    Last edited:

    kiwijunglist

    Super Moderator
  • Team MediaPortal
  • June 10, 2008
    6,746
    1,751
    New Zealand
    Home Country
    New Zealand New Zealand
    Video Playback - Hardware Acceleration

    Introduction
    Hardware acceleration is good because
    1. Uses less CPU power to play videos
    2. Uses less power to play videos
    3. Can build a cheaper HTPC by letting the video card do the work
    4. If CPU becomes busy then video still looks smooth

    Mediaportal Video Renderer

    This should correctly be set by default.
    Windows XP = VMR9
    Everything else = EVR
    hardwareaccel.jpg

    Video Codec

    The following video codecs support hardware acceleration in one form or another
    Microsoft DVD-DTV Video, PowerDVD, MPC Video, FFDShow (DXVA), LAV Video, Arcsoft Total Media, CoreAVC

    We are going to use LAV Video because it comes with MediaPortal

    dxva02.jpg


    dxva03.jpg

    Hardware Decoder:
    AMD HD4XXX / HD5XXX - Choose DXVA2 (native)
    AMD HD6XXX / HD7XXX - Choose DXVA2 (copy back) [If stutter problems change to native]
    Low End Nvidia - Choose DXVA2 (native)
    High End Nvidia - Choose Nvidia CUVID + adaptive HW deinterlacing, output: 50p/60p (or) DXVA2 (native)
    Intel - Choose Intel QuickSync + adaptive HW deinterlacing, output: 50p/60p
    Low end GPU that doesn't do HW accleration, choose none

    That is all you need to do.
     
    Last edited:

    kiwijunglist

    Super Moderator
  • Team MediaPortal
  • June 10, 2008
    6,746
    1,751
    New Zealand
    Home Country
    New Zealand New Zealand
    Video Playback - Bluray Discs

    You have two options

    1. Play Bluray discs within mediaportal

    Advantages - You can use the Mediaportal menus and onscreen display with your remote while you play your bluray
    Disadvantages - May not work with all bluray titles, you need to use an on the fly decrypter, some bluray menus might not work.

    Refer to wiki for more information
    http://wiki.team-mediaportal.com/1_MEDIAPORTAL_1/0_What's_New/1.3.x/Native_Blu-ray_Support
    http://wiki.team-mediaportal.com/1_...guration/MediaPortal_Configuration/20_Blu-ray

    2. Play Bluray discs with an external player

    Advantages - Should work with all blurays depending on your player
    Disadvantages - Miss out on features like MPAR, DRR, Will have to setup your remote separately if supported.

    Refer to wiki for more information:
    http://wiki.team-mediaportal.com/1_...guration/MediaPortal_Configuration/20_Blu-ray

    Tips

    - If you experience bluray stuttering try and put your connect your bluray SATA cable to a different SATA controller. Most motherboards have 6 SATA ports and either 2 or 3 controller chips. You can tell which SATA port is used by which controller by the colour of the socket. Some forum users have had stutter caused by having the OS HDD and bluray on the same SATA controller.
     
    Last edited:

    kiwijunglist

    Super Moderator
  • Team MediaPortal
  • June 10, 2008
    6,746
    1,751
    New Zealand
    Home Country
    New Zealand New Zealand
    Video Playback - Up-scaling SD Video and Post Processing

    It's debatable as to whether this actual helps much over using GPU scaling so I am going to put the whole thing in spoiler tags :) If you use ffdshow to process the video you will also loose hardware acceleration. I would advise that most people just skip this section.

    This step is only necessary if you watch a lot of SD videos. If you have a low end HTPC or a slow CPU then skip this part of the guide. If your TV is not 1920x1080 then you should also skip this part of the guide (unless you feel comfortable editing my profile and changing all the re-sizing profiles)

    Since we are going to use ffdshow for everything we no longer have hardware acceleration. If you still want to have hardware acceleration for high bitrate videos, then you can just choose ffdshow for MPEG-2 and DivX/Xvid and leave the others with LAV Video. If you use LAV for h264 videos, you will not get upscaling or post processing for SD h264 videos.

    Install FFDShow Tryouts
    http://ffdshow-tryout.sourceforge.net/
    (If you already have ffdshow you should uninstall it then reinstall it. When you re install click yes to reset all options to default)

    Use my ffdshow presets
    Download and extract ffdshow_v01.rar
    Rn ffdshow_v01.reg (not while ffdshow is running)

    There are separate profiles for 1080P / 720P / SD-DVD / SD-DivX / SD-Other
    In case you are wondering my settings are based on this guide.

    Change the video codecs to ffdshow

    ffdshow01.jpg

    ffdshow04.jpg


    Also change the DVD codec (and optionally the MPEG-2 TV codec)
    ffdshow02.jpg


    Run ffdshow video configuration and check you have the profiles like the screenshot

    ffdshow03.jpg


    Restart your PC

    This is an Important step. After restarting all your Videos and DVDs will use ffdshow with upscaling. Blu rays will still use LAV Video. If you want to check what codec is being used press shift+1 while playing a video. I will probably update the .reg file with better up-scaling settings in the future.

    Notes

    There are other ways to do upscaling and post processing. If you have an AMD HD6XXX or HD7XXX you can use DXVA2 (copy back) in LAV then add ffdshow to postprocessing then use raw video decoder in ffdshow and set up various profiles based on the video resolution. This would allow you to have post processing with dxva.

    I also have some ffdshow settings that I have tweaked further
    https://forum.team-mediaportal.com/...isplay-calibration.119610/page-5#post-1003965
     

    Attachments

    • ffdshow v01.rar
      8.8 KB
    Last edited:

    Users who are viewing this thread

    Top Bottom